Cart 0
Cart 0
 

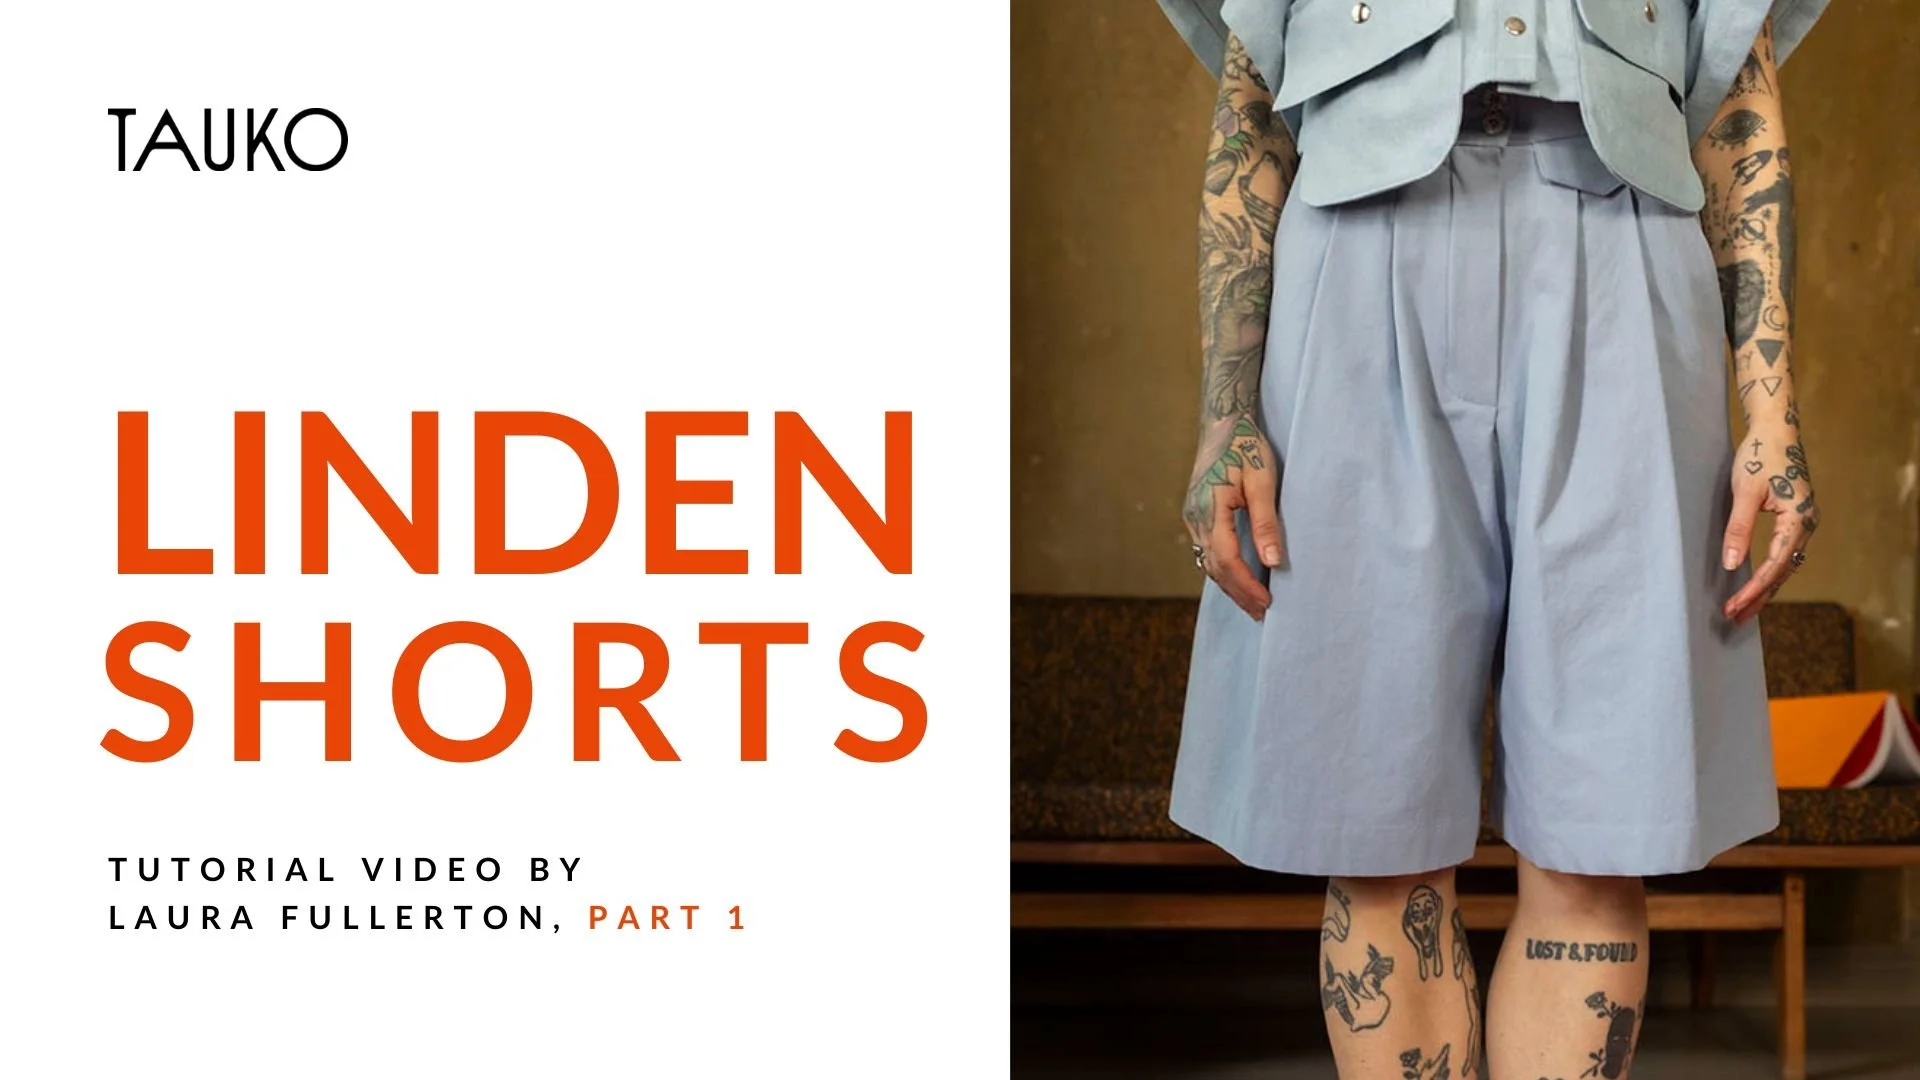
Aurelia Dress Sew Along

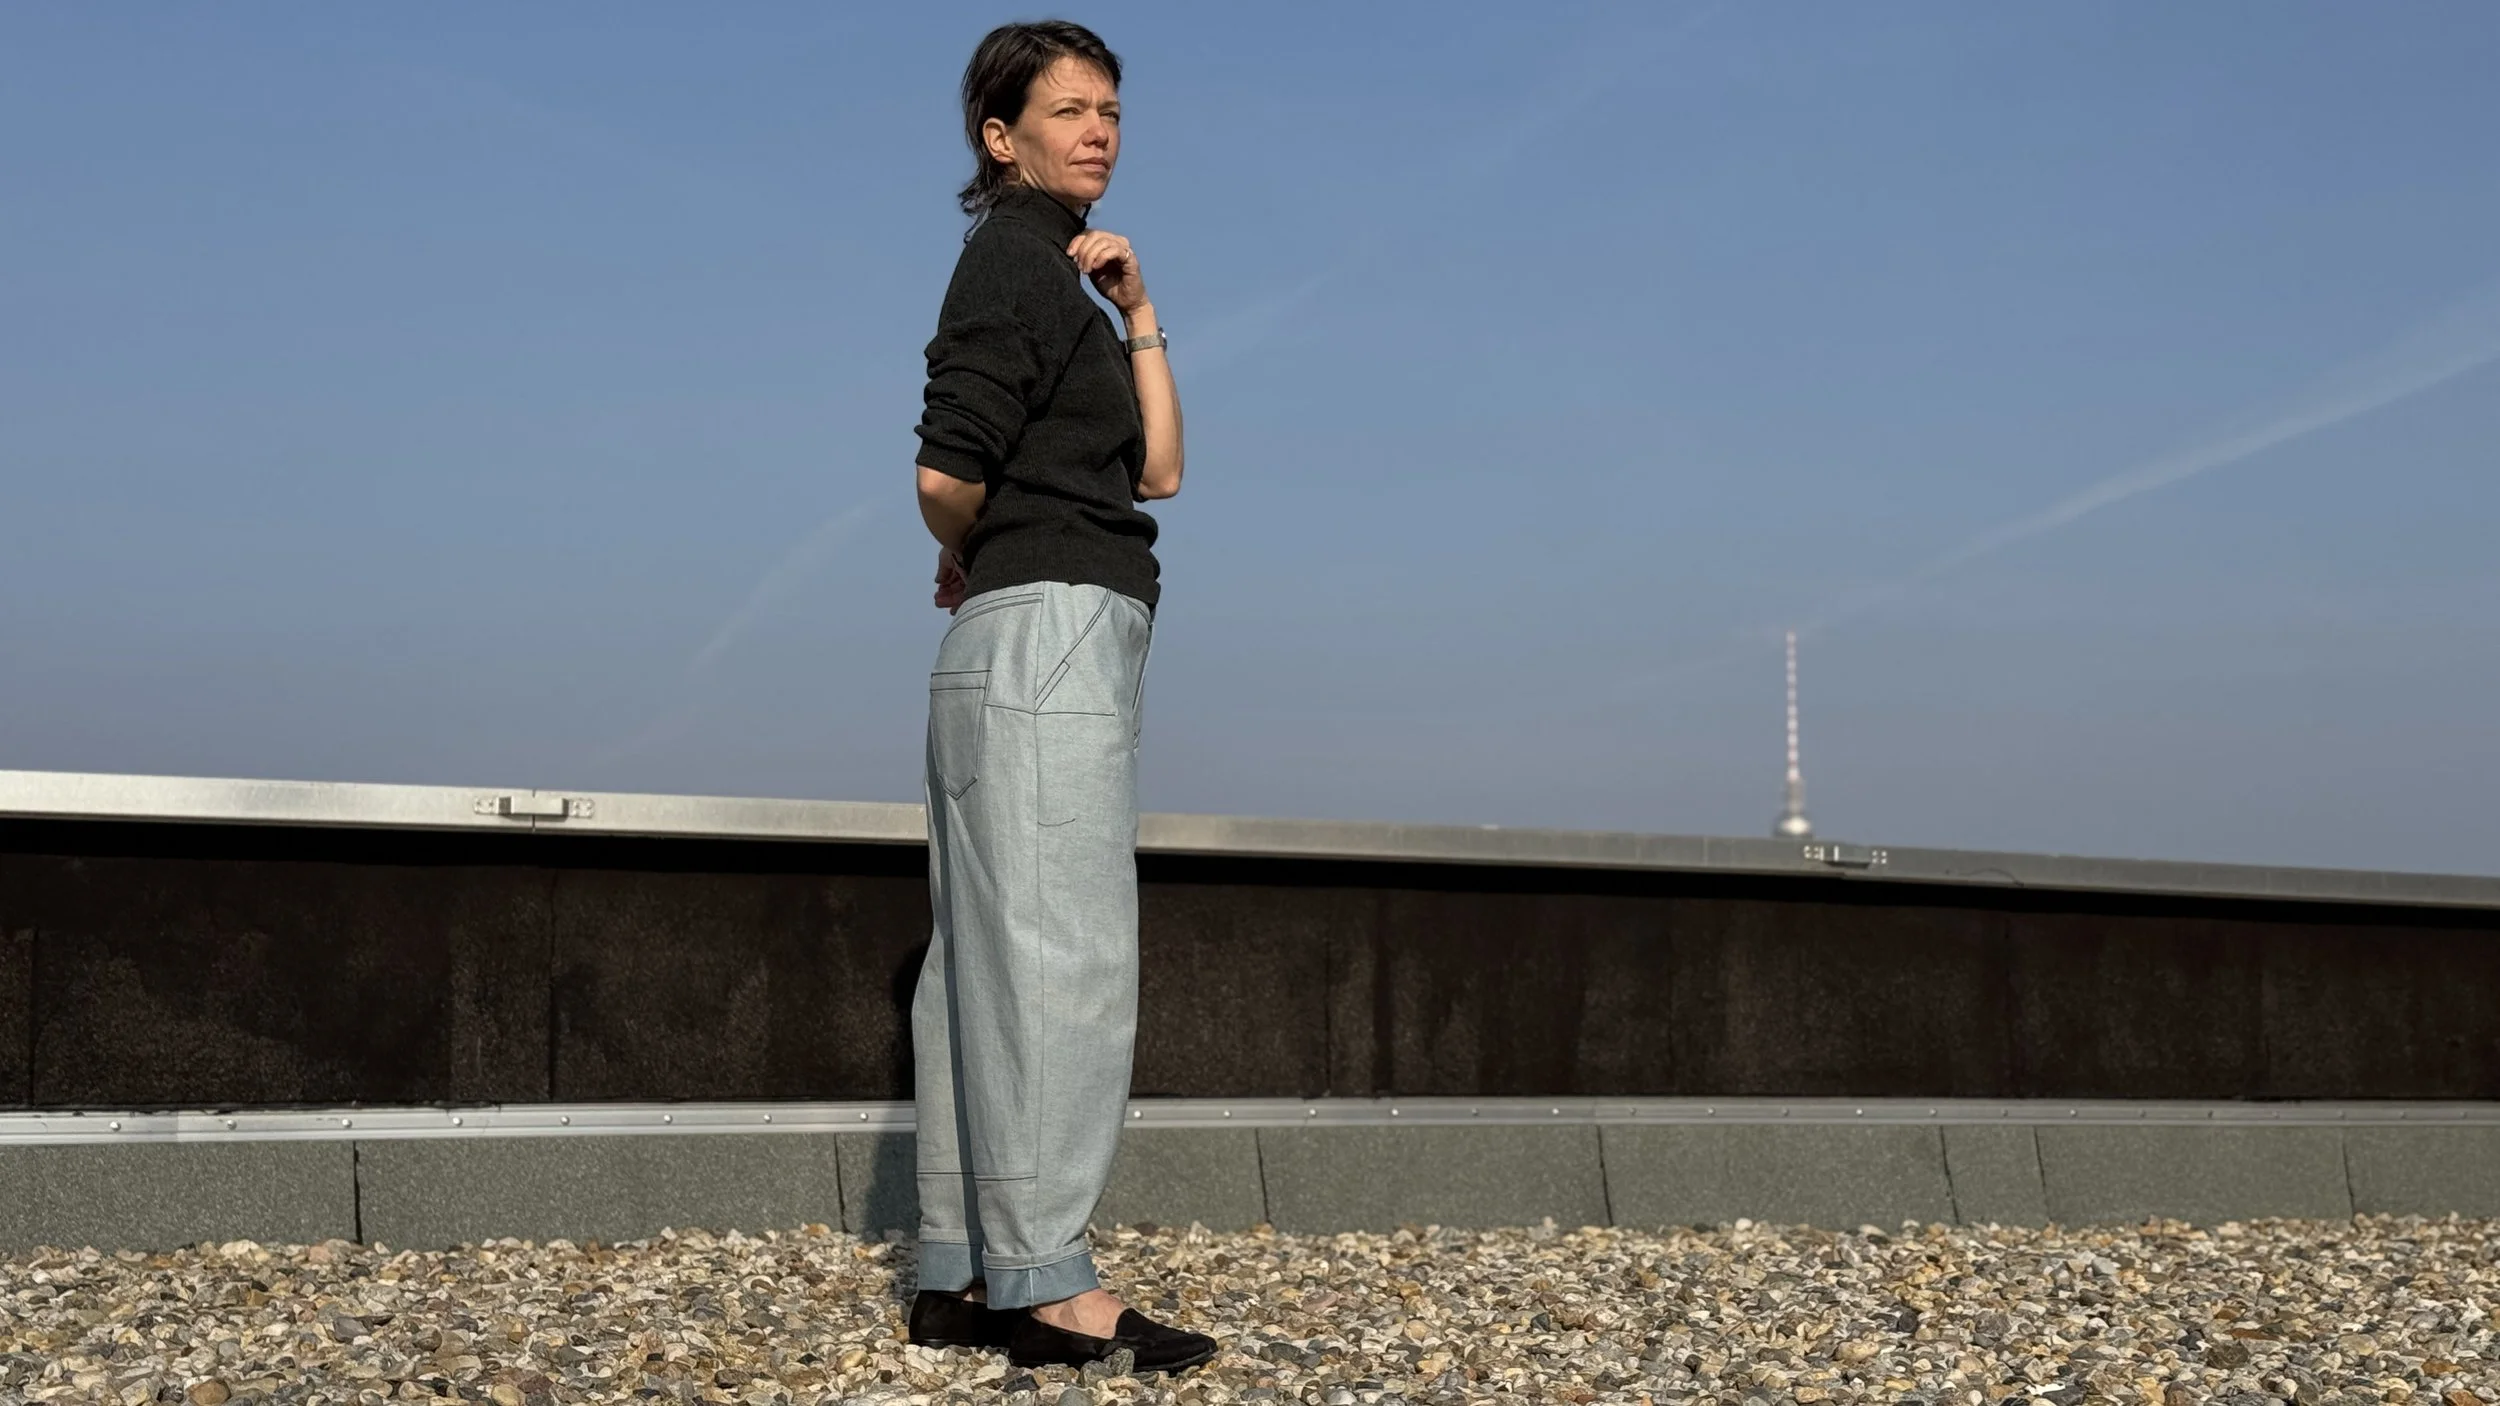
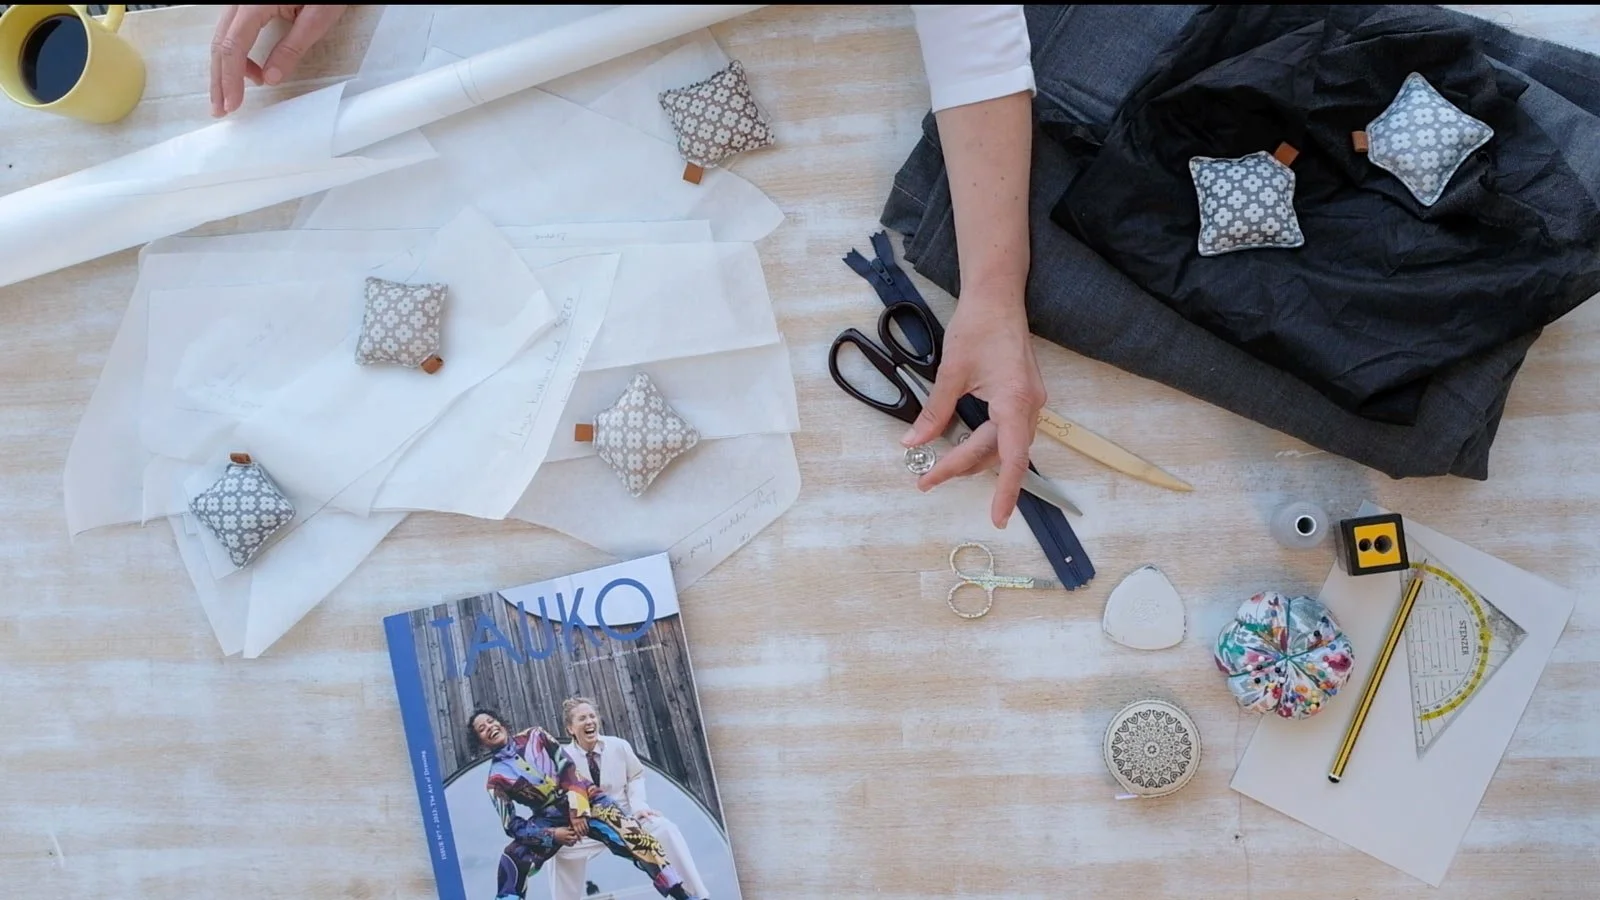
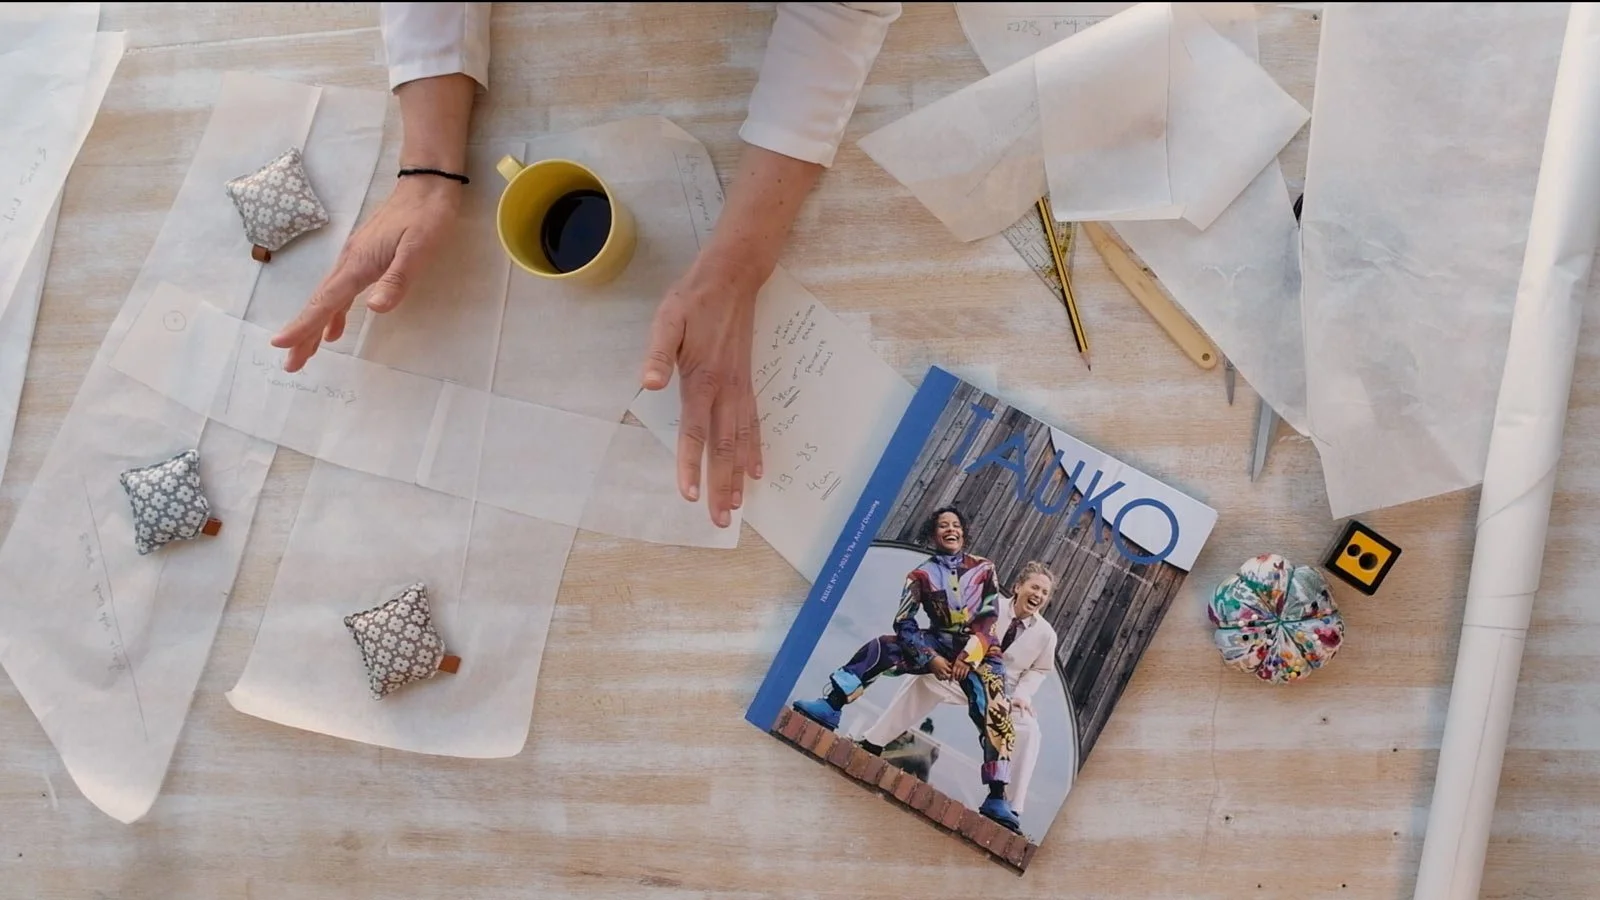
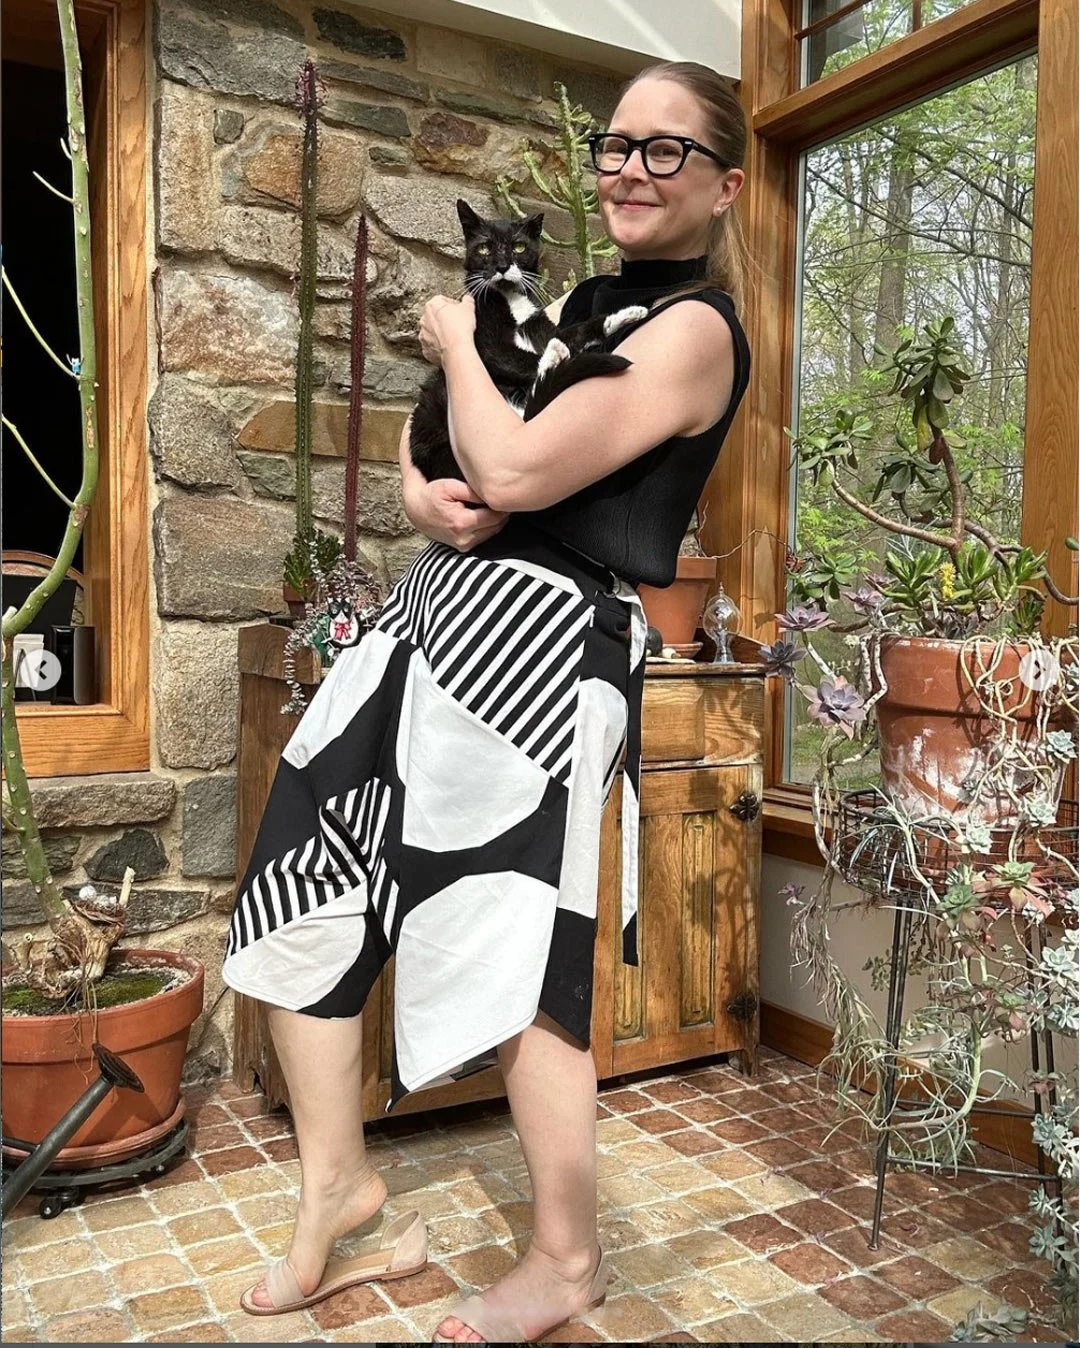
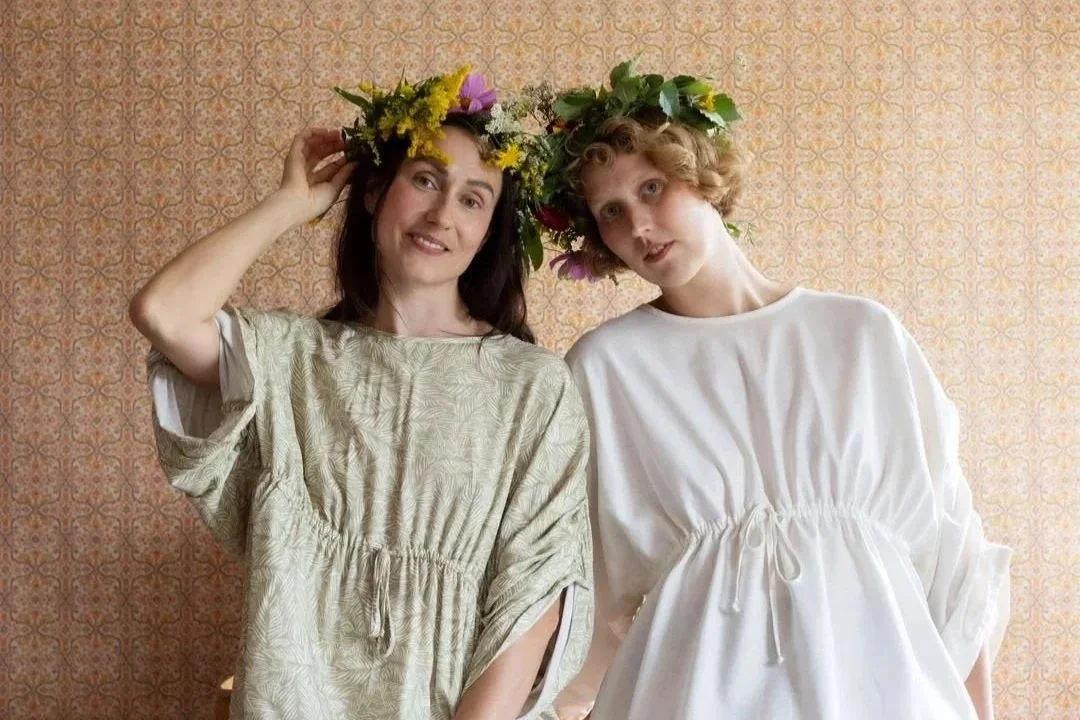
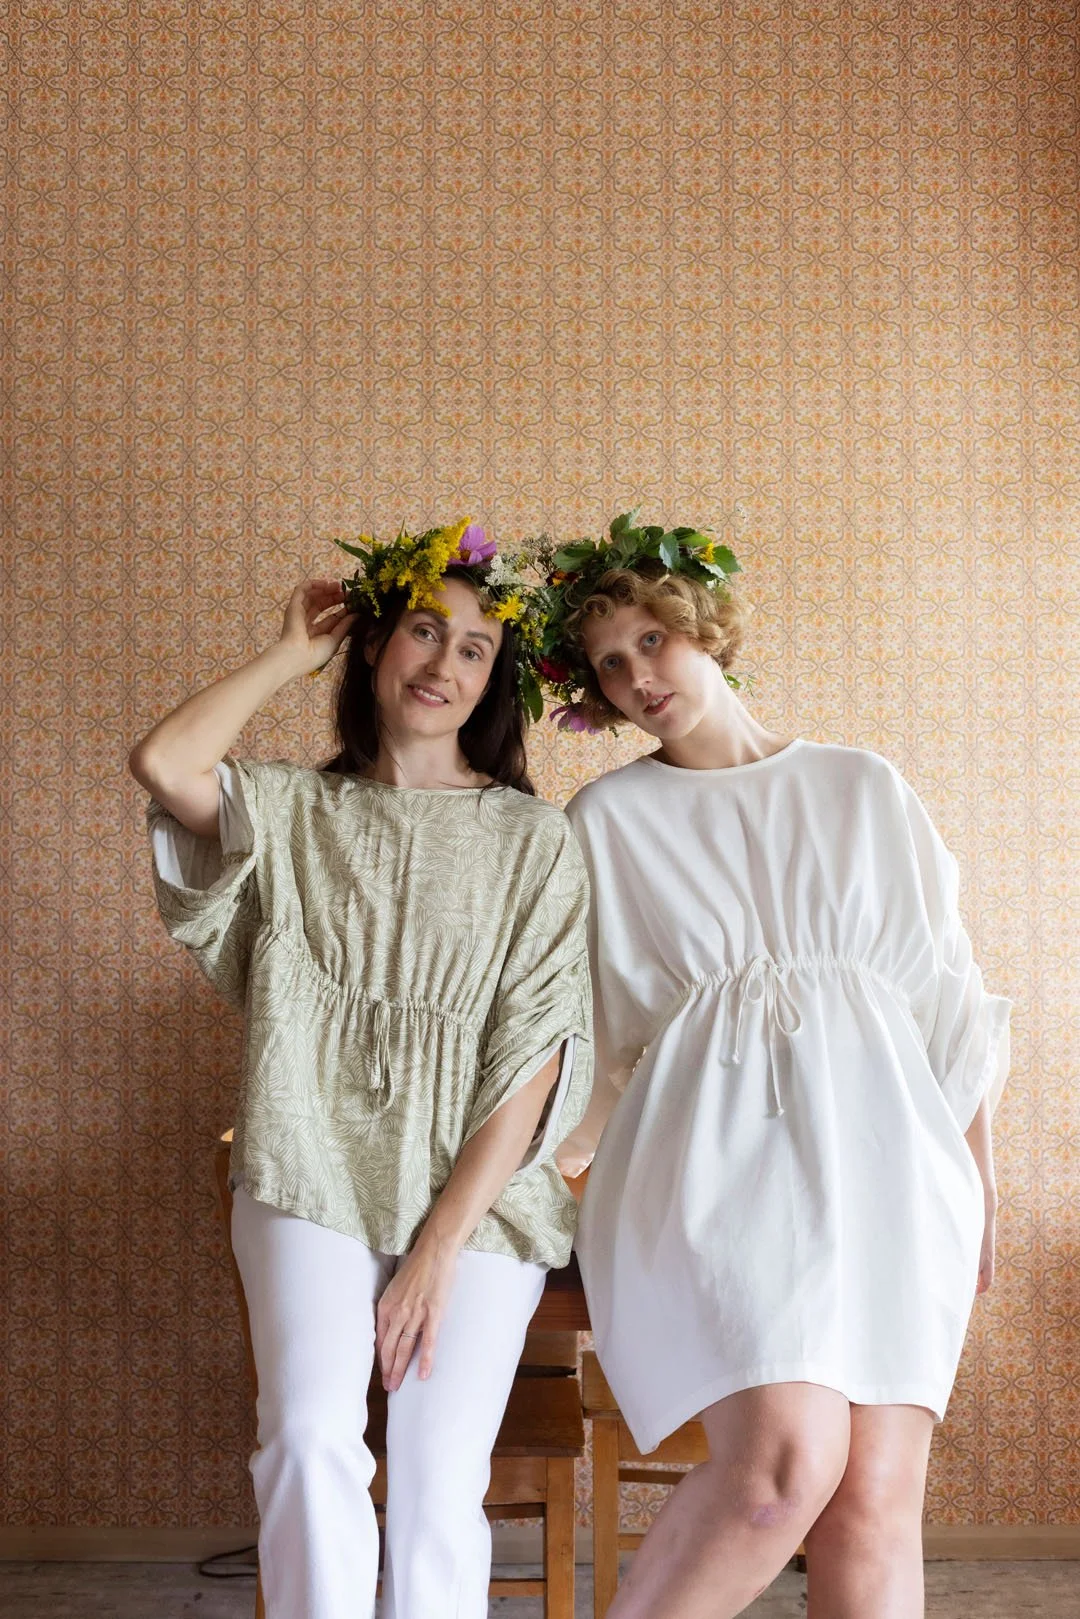
We are inviting the sewing community to sew along the cover design of issue No. 6, the AURELIA dress with us! In the the sew along tutorial video our co-founder, Mila Moisio, will be showing step by step how to make the puffy sleeved and fully lined dress. We will walk you through the whole process, starting from selecting the right kind of fabrics for your project and giving tips on tracing patterns, cutting and sewing. In the special video features Mila is showing how to find your size and sharing learnings from making her AURELIA.


Notes & Tips

Fit & Size

PART 1: Tracing the Patterns

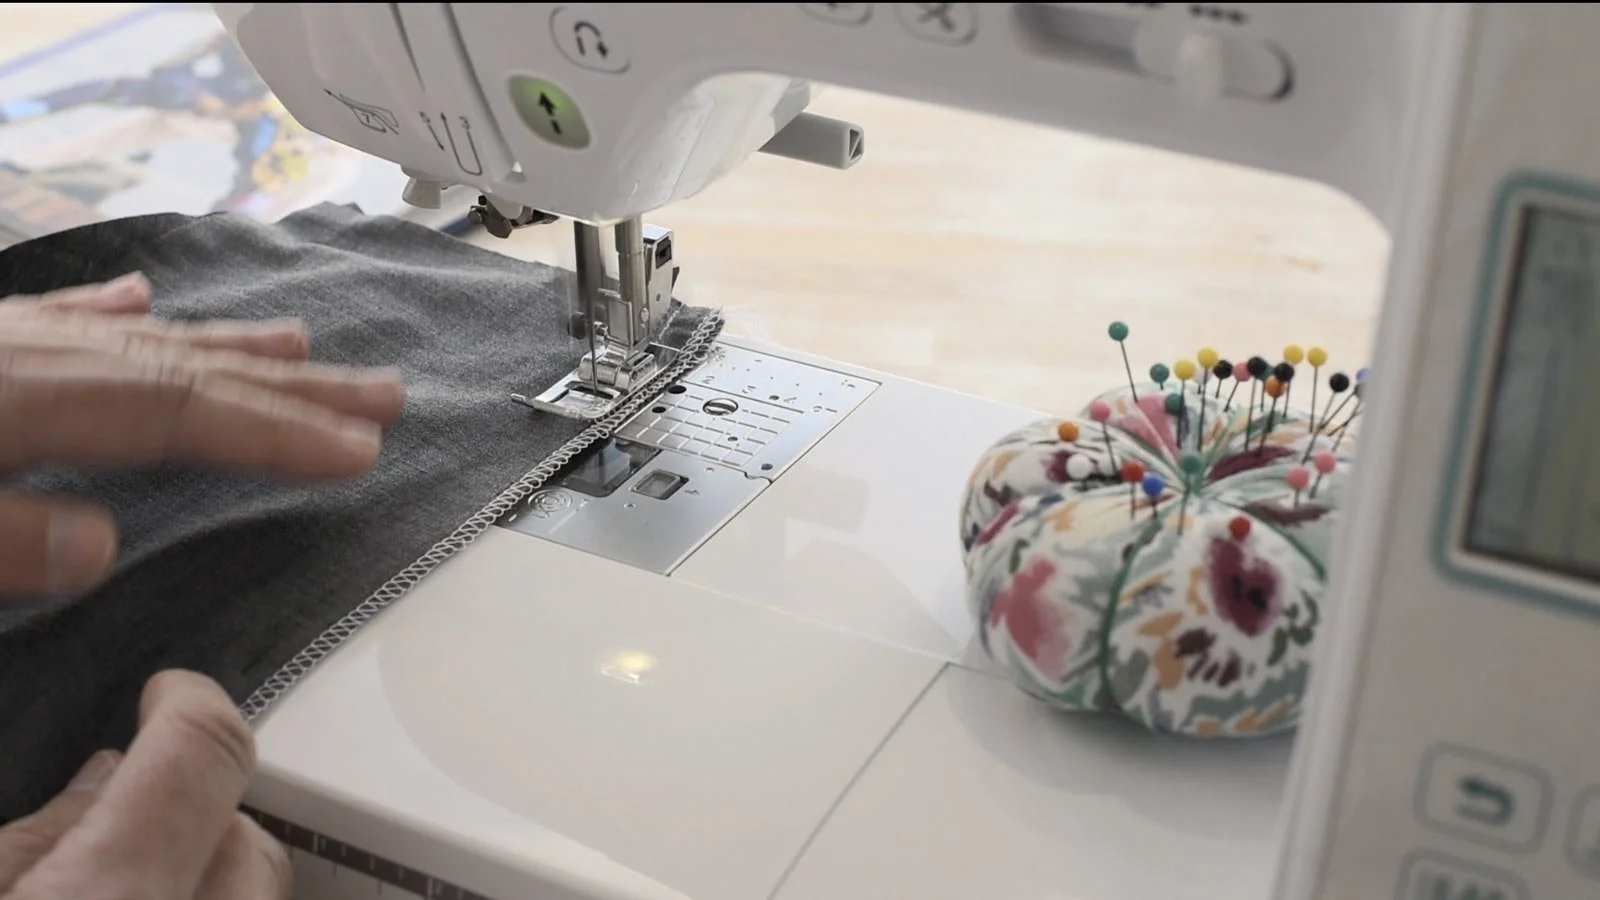
PART 2: Fabrics, Tools and Cutting

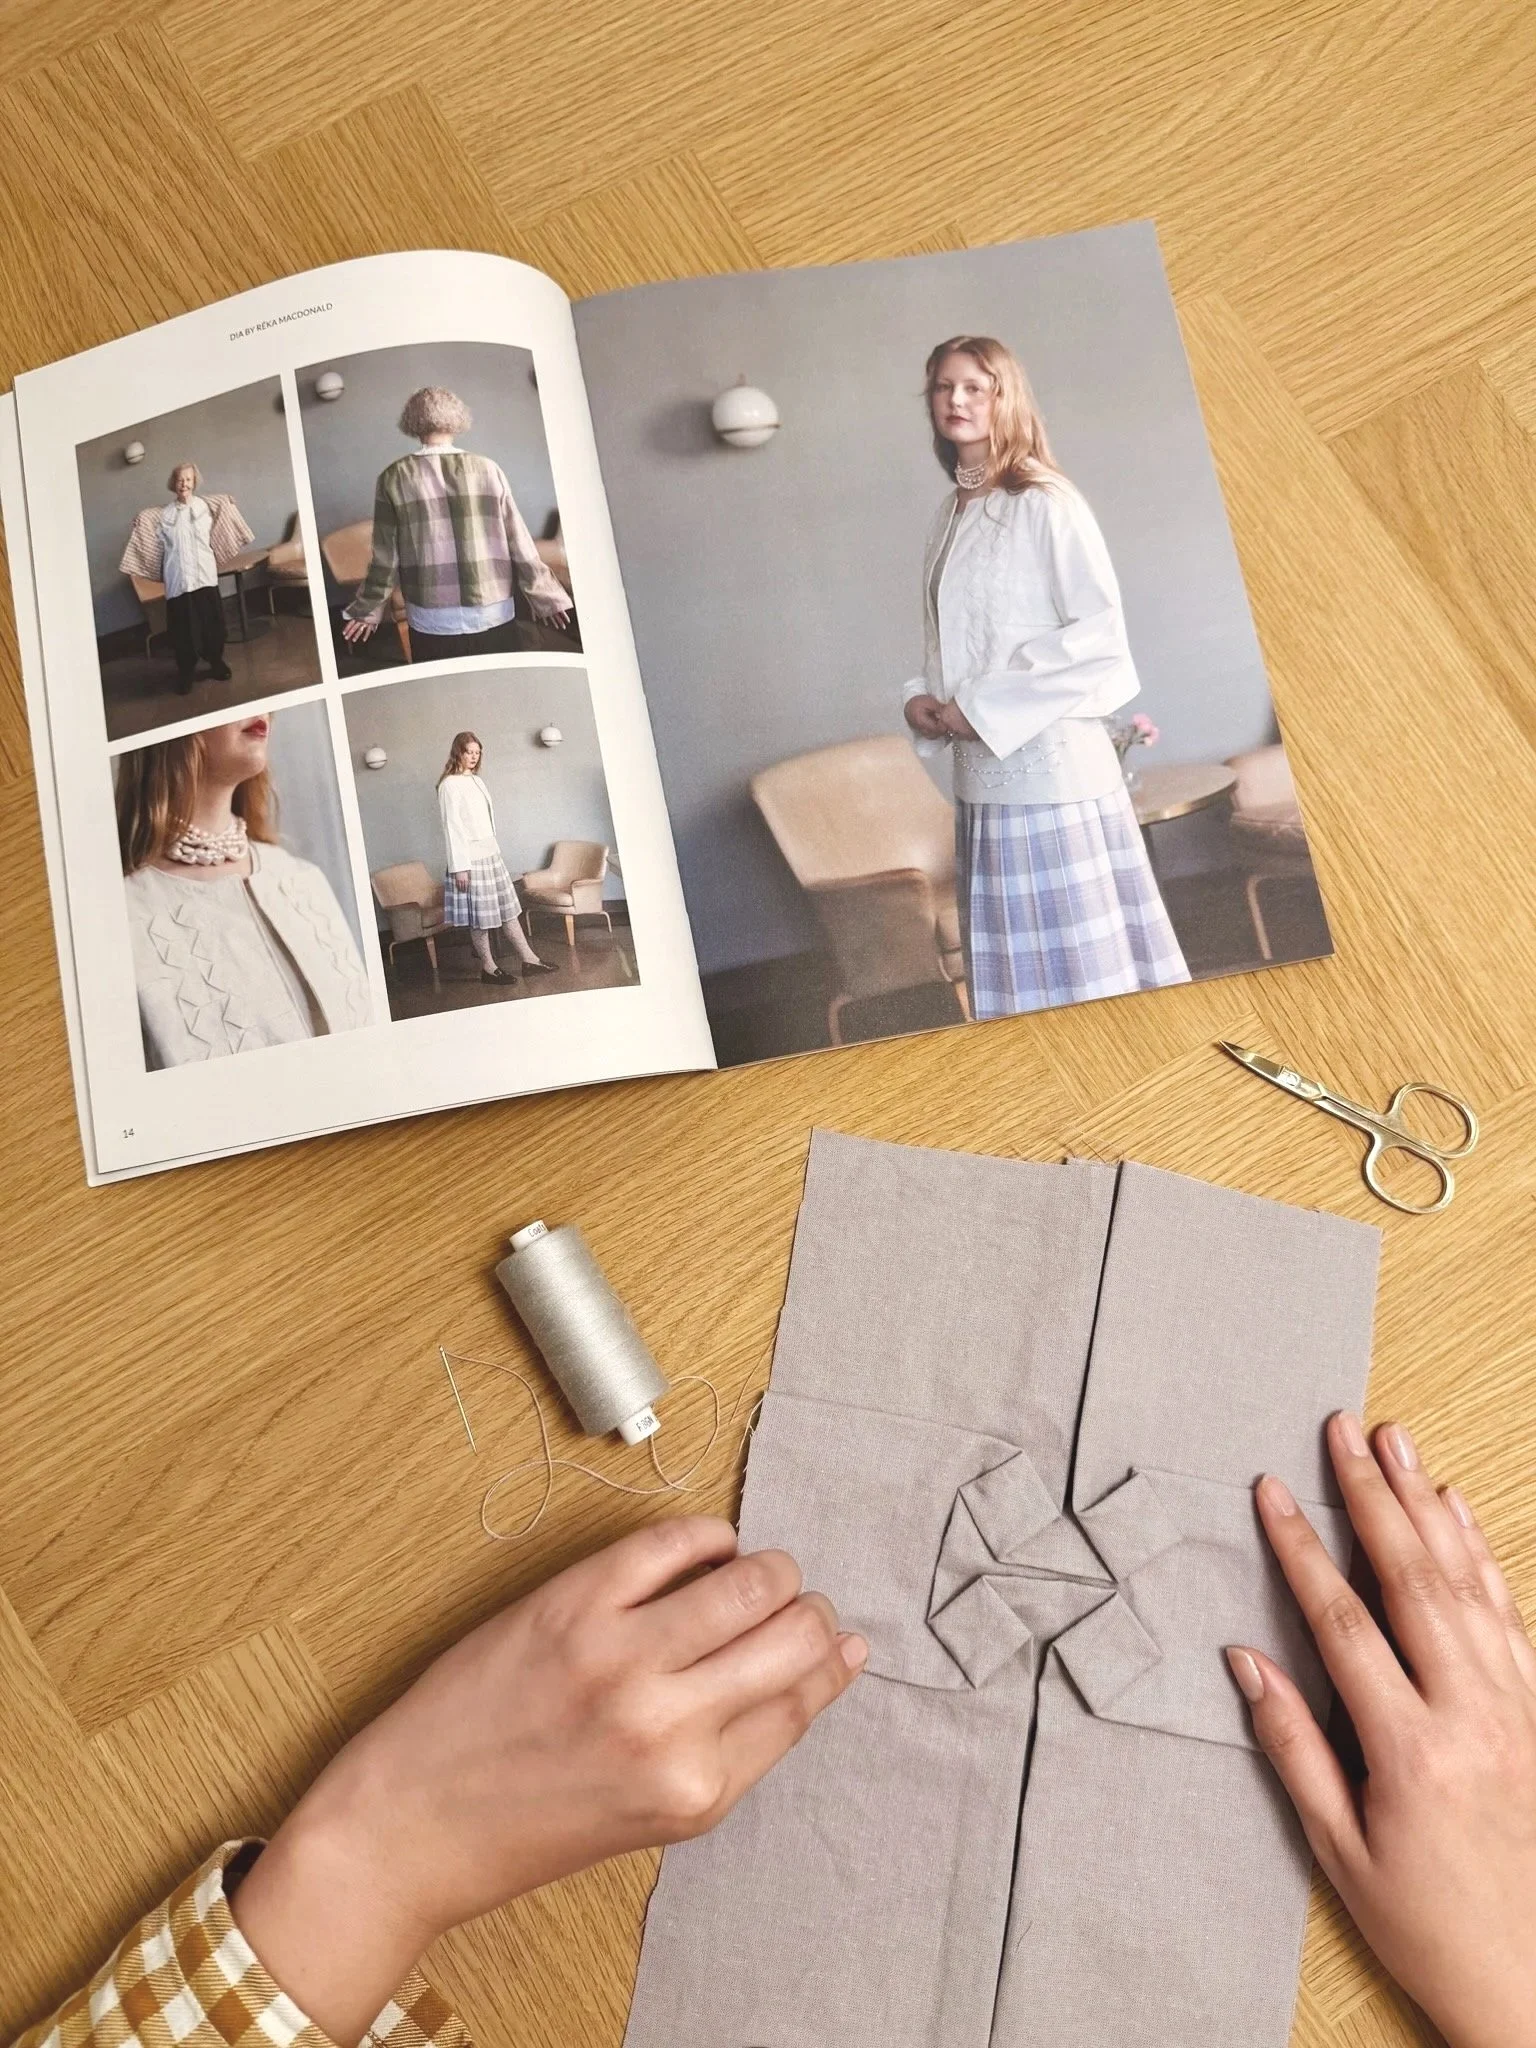
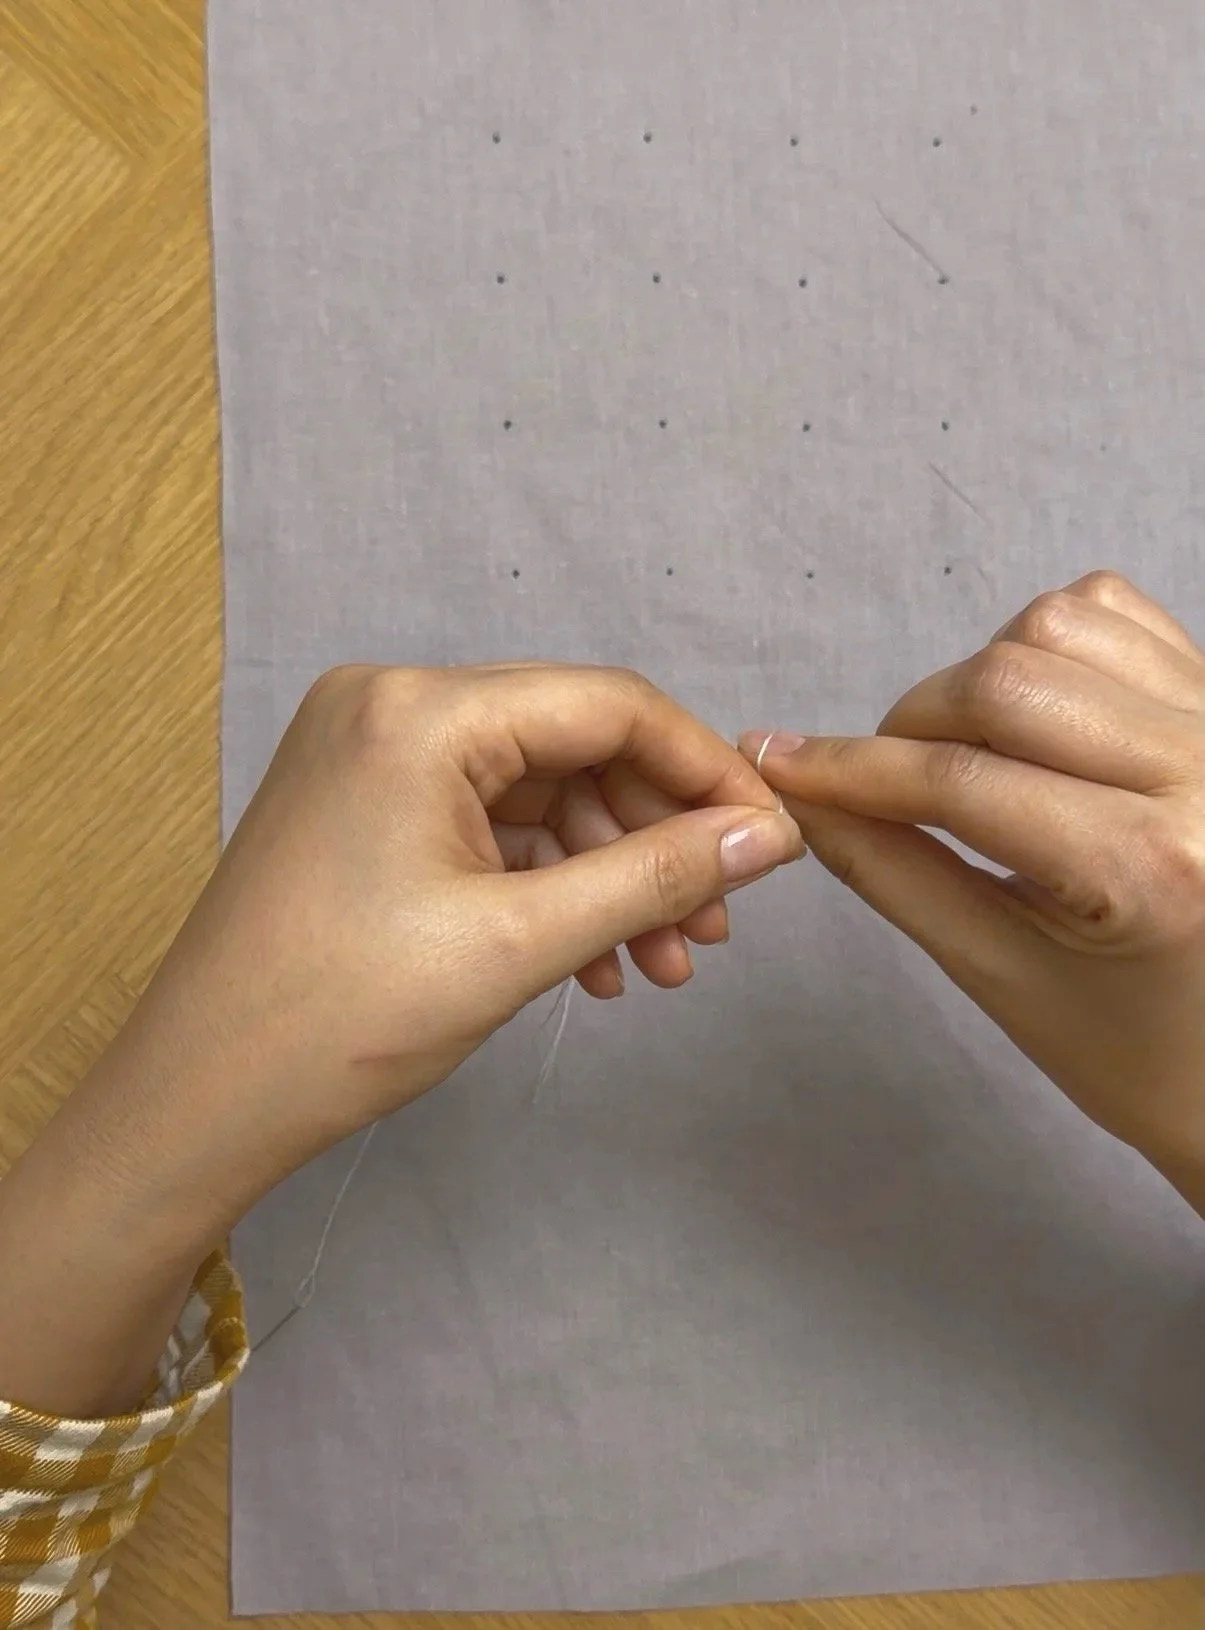
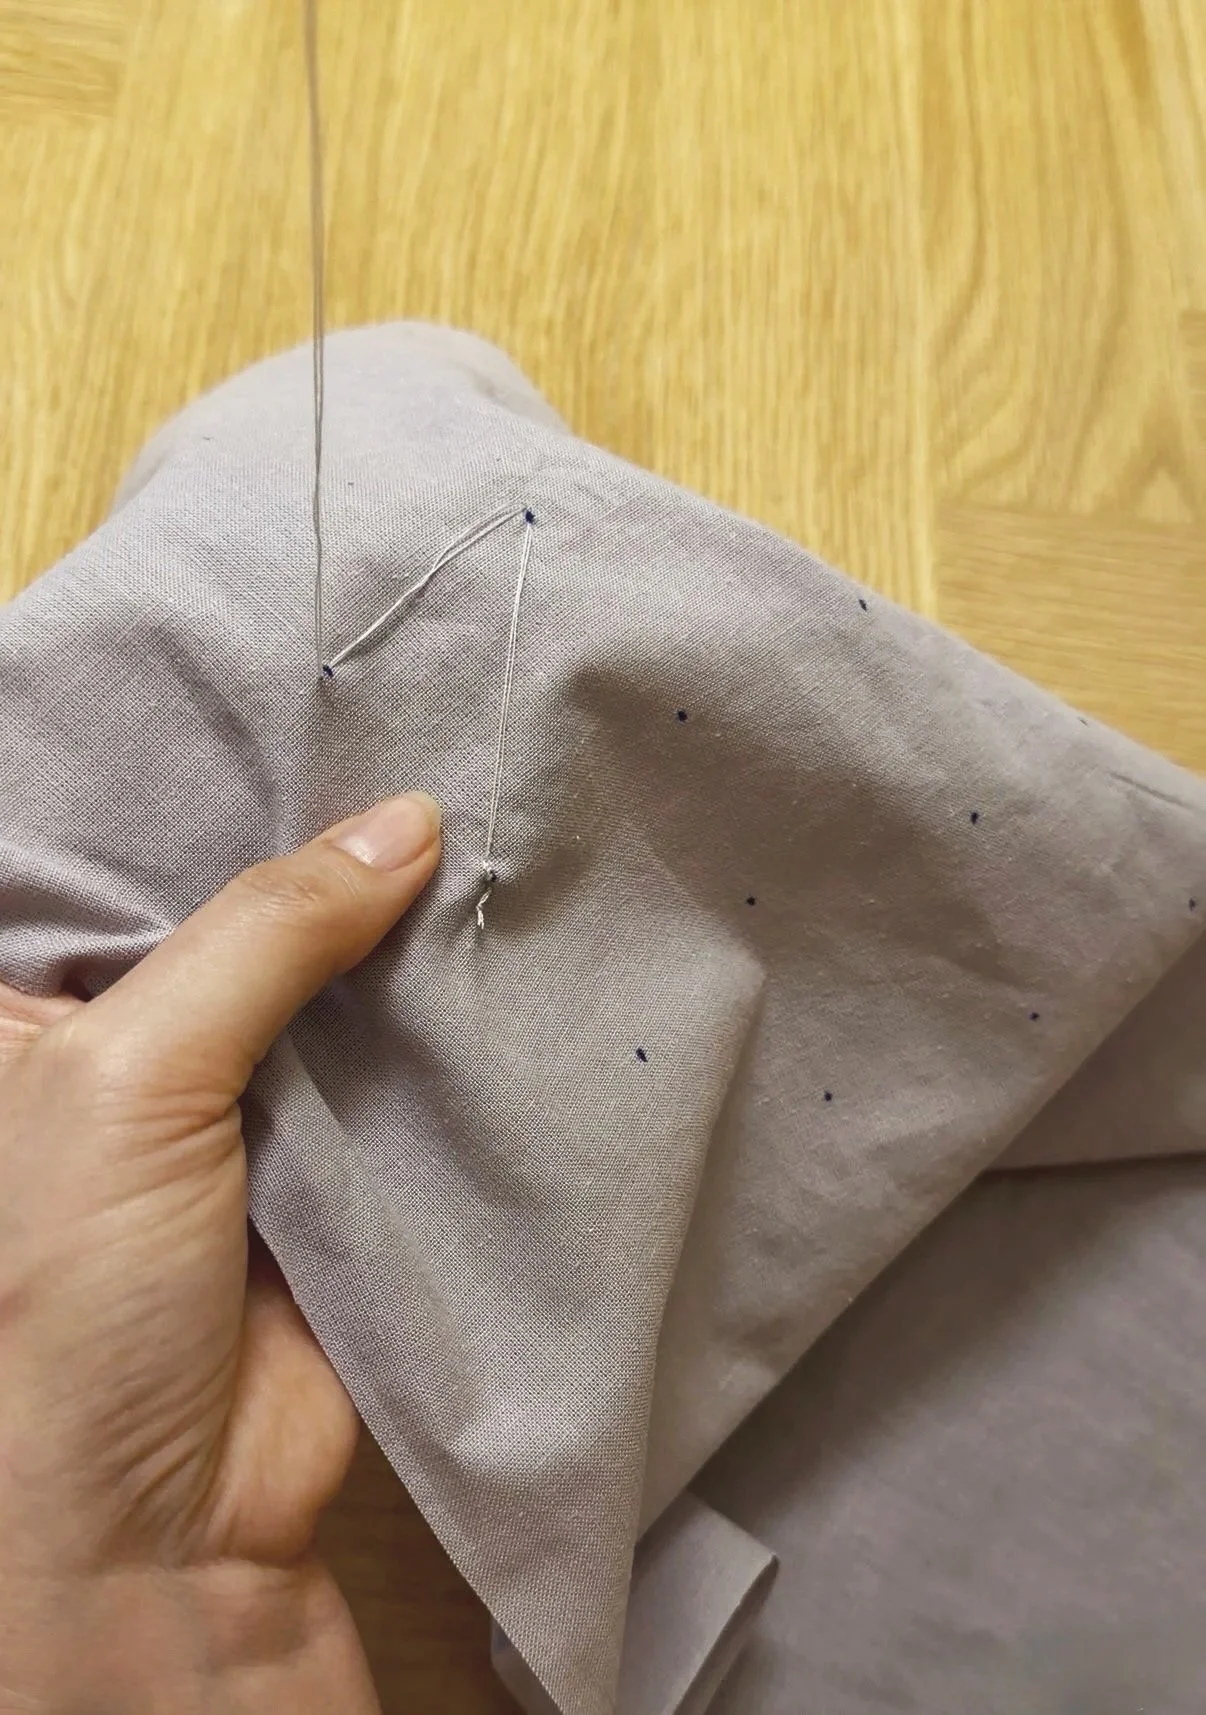
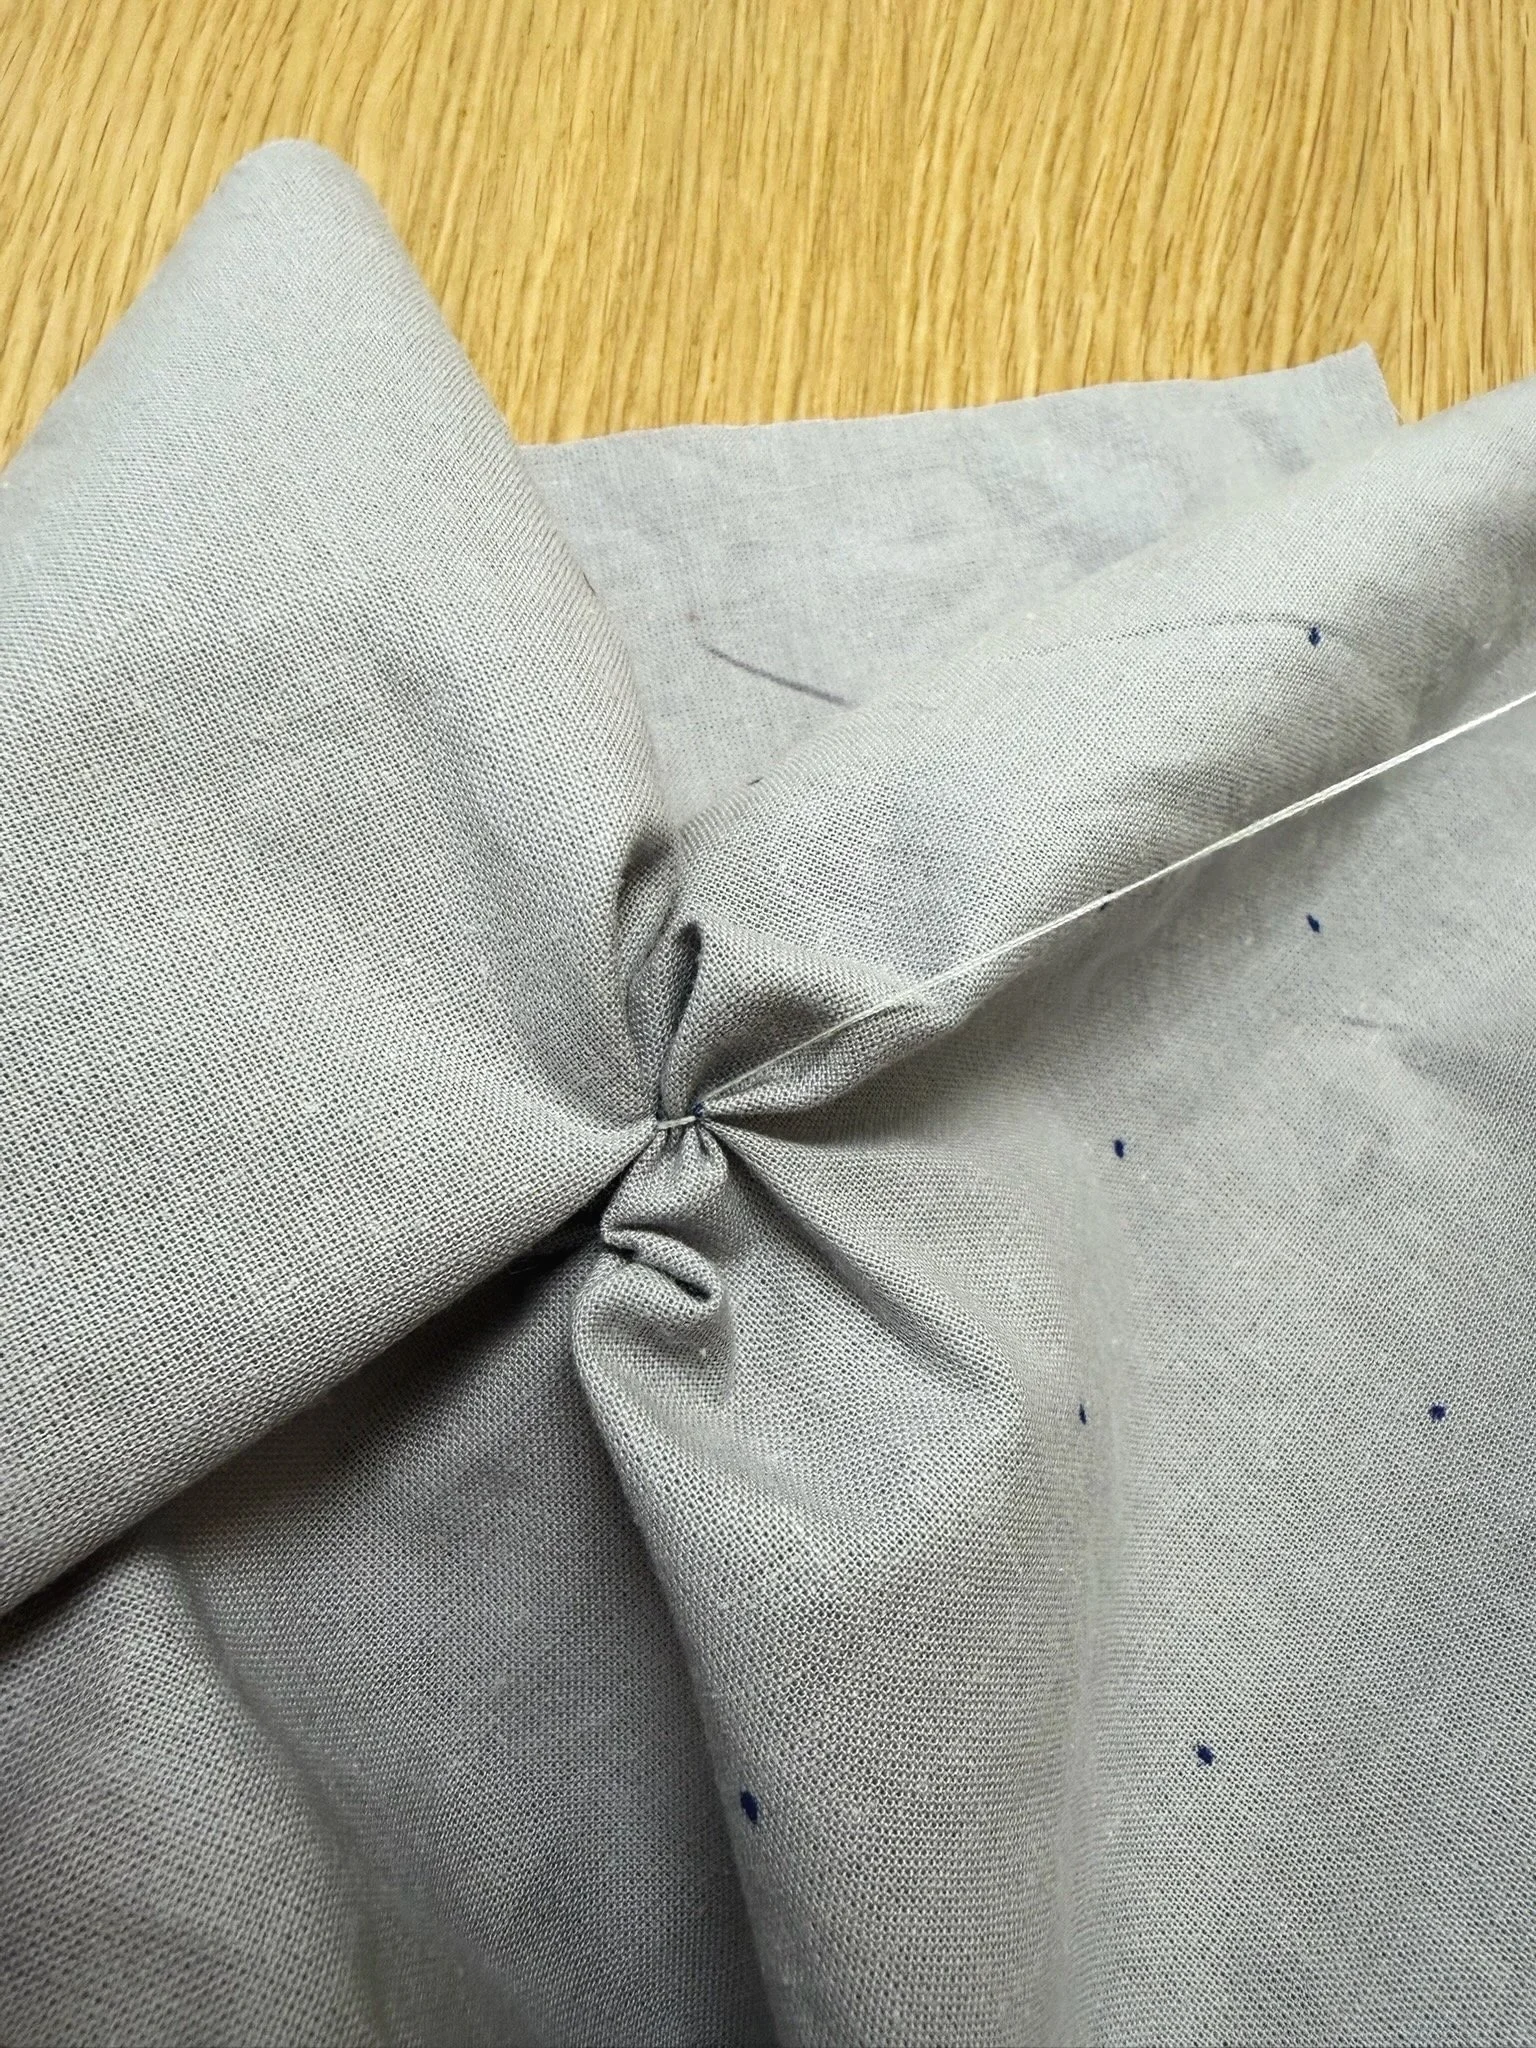
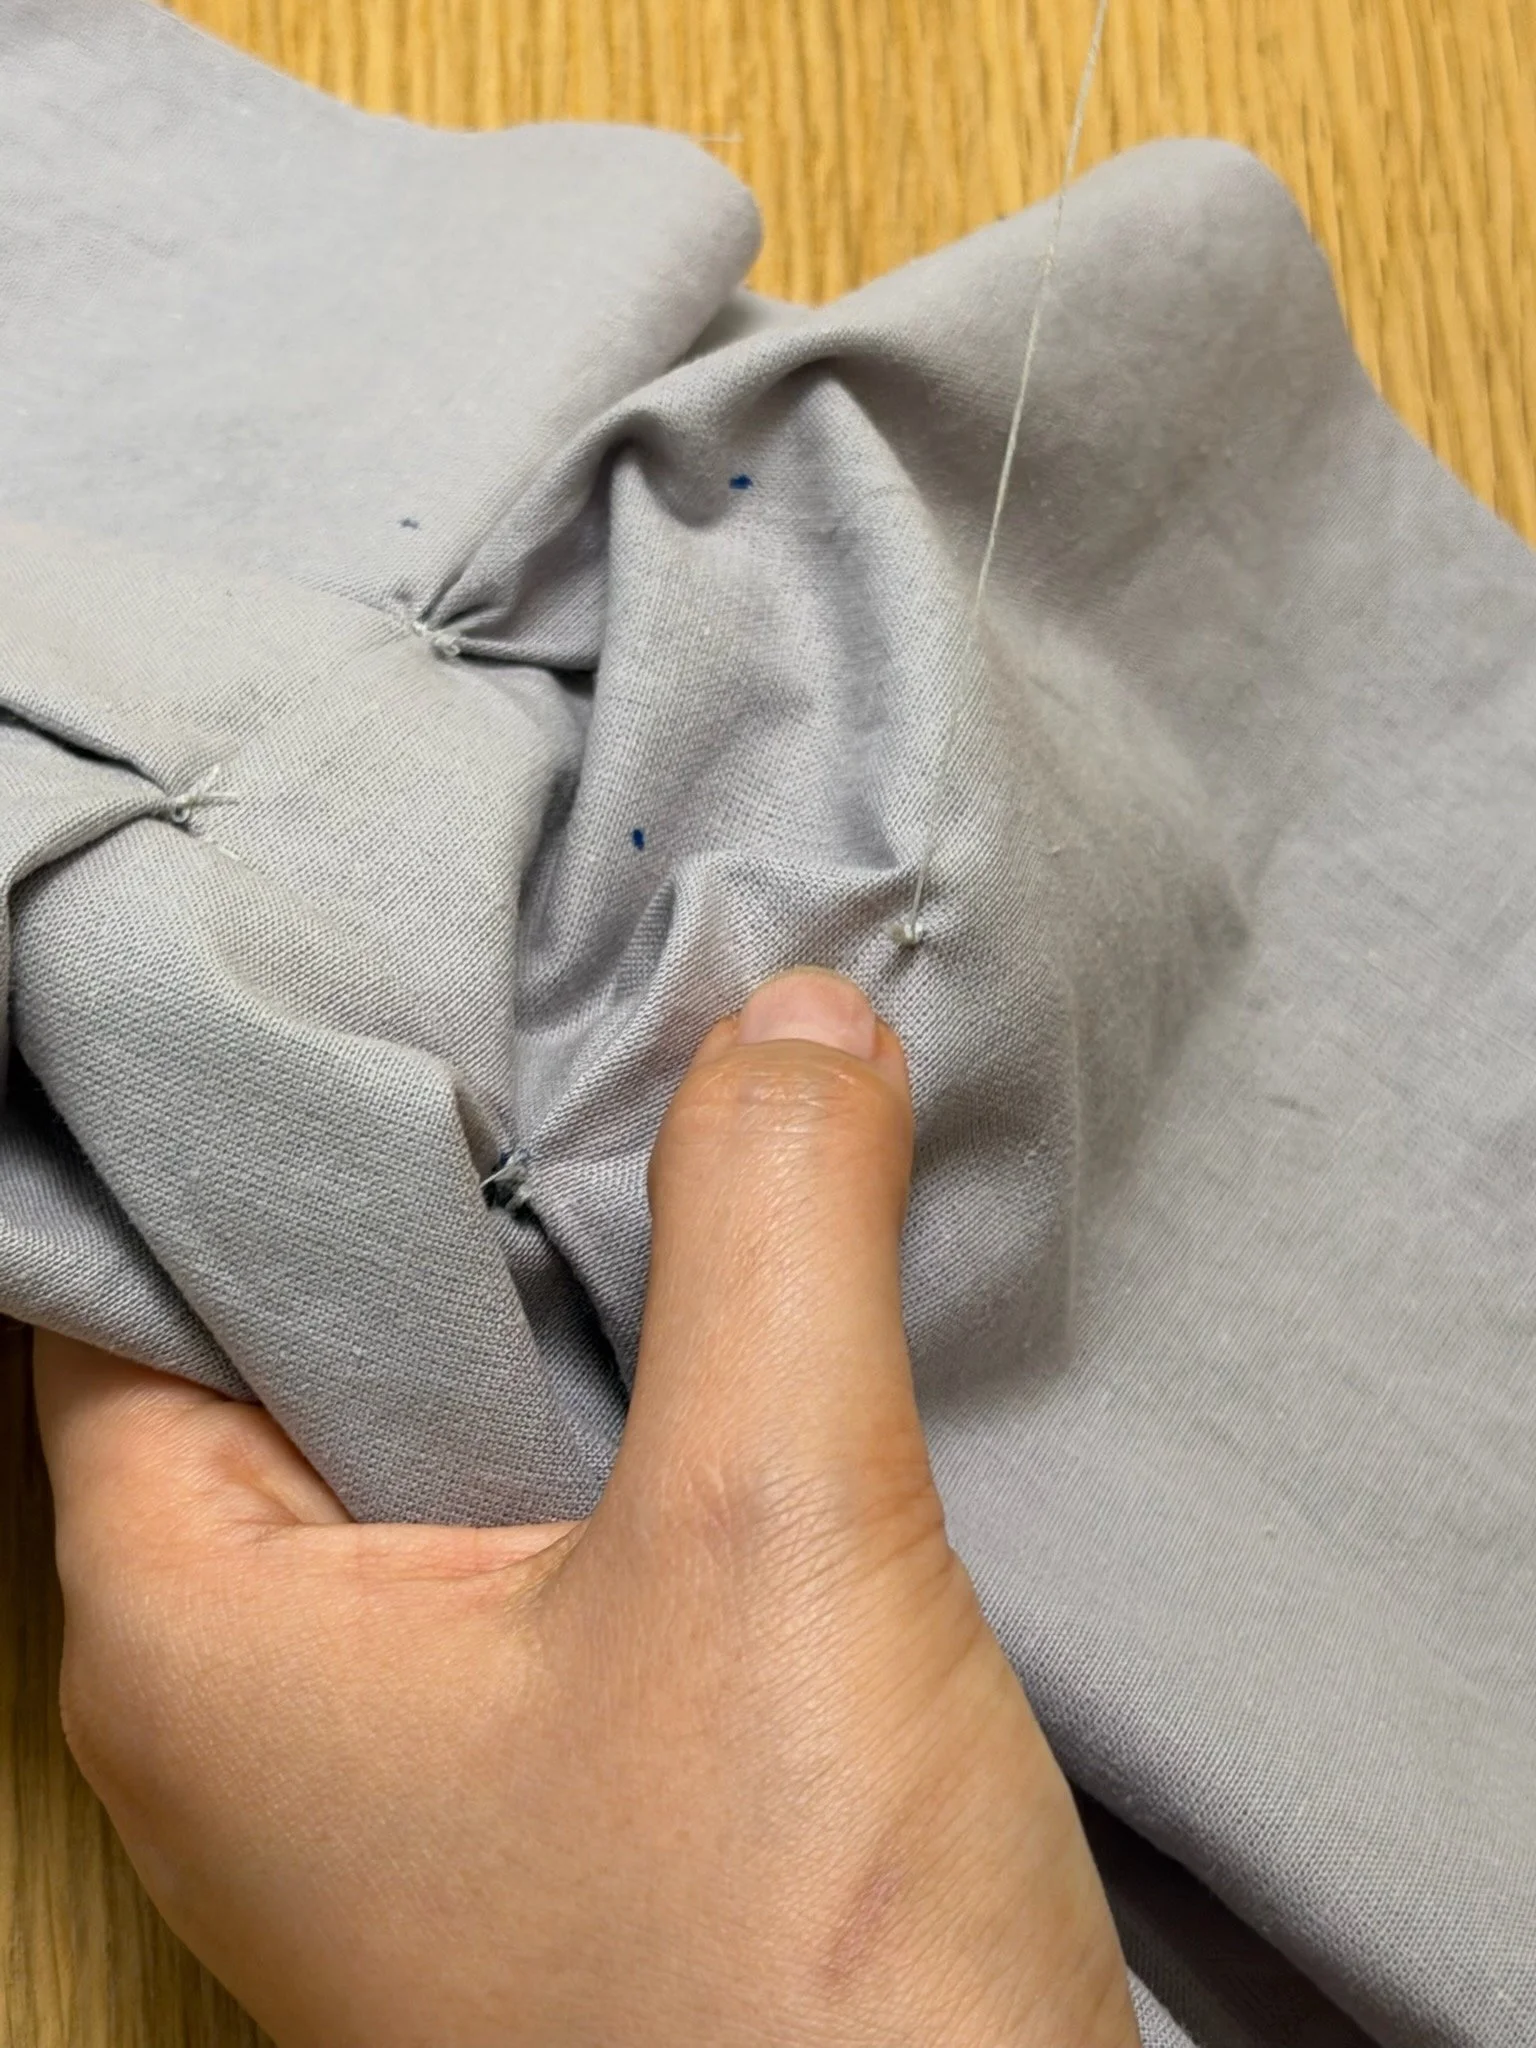
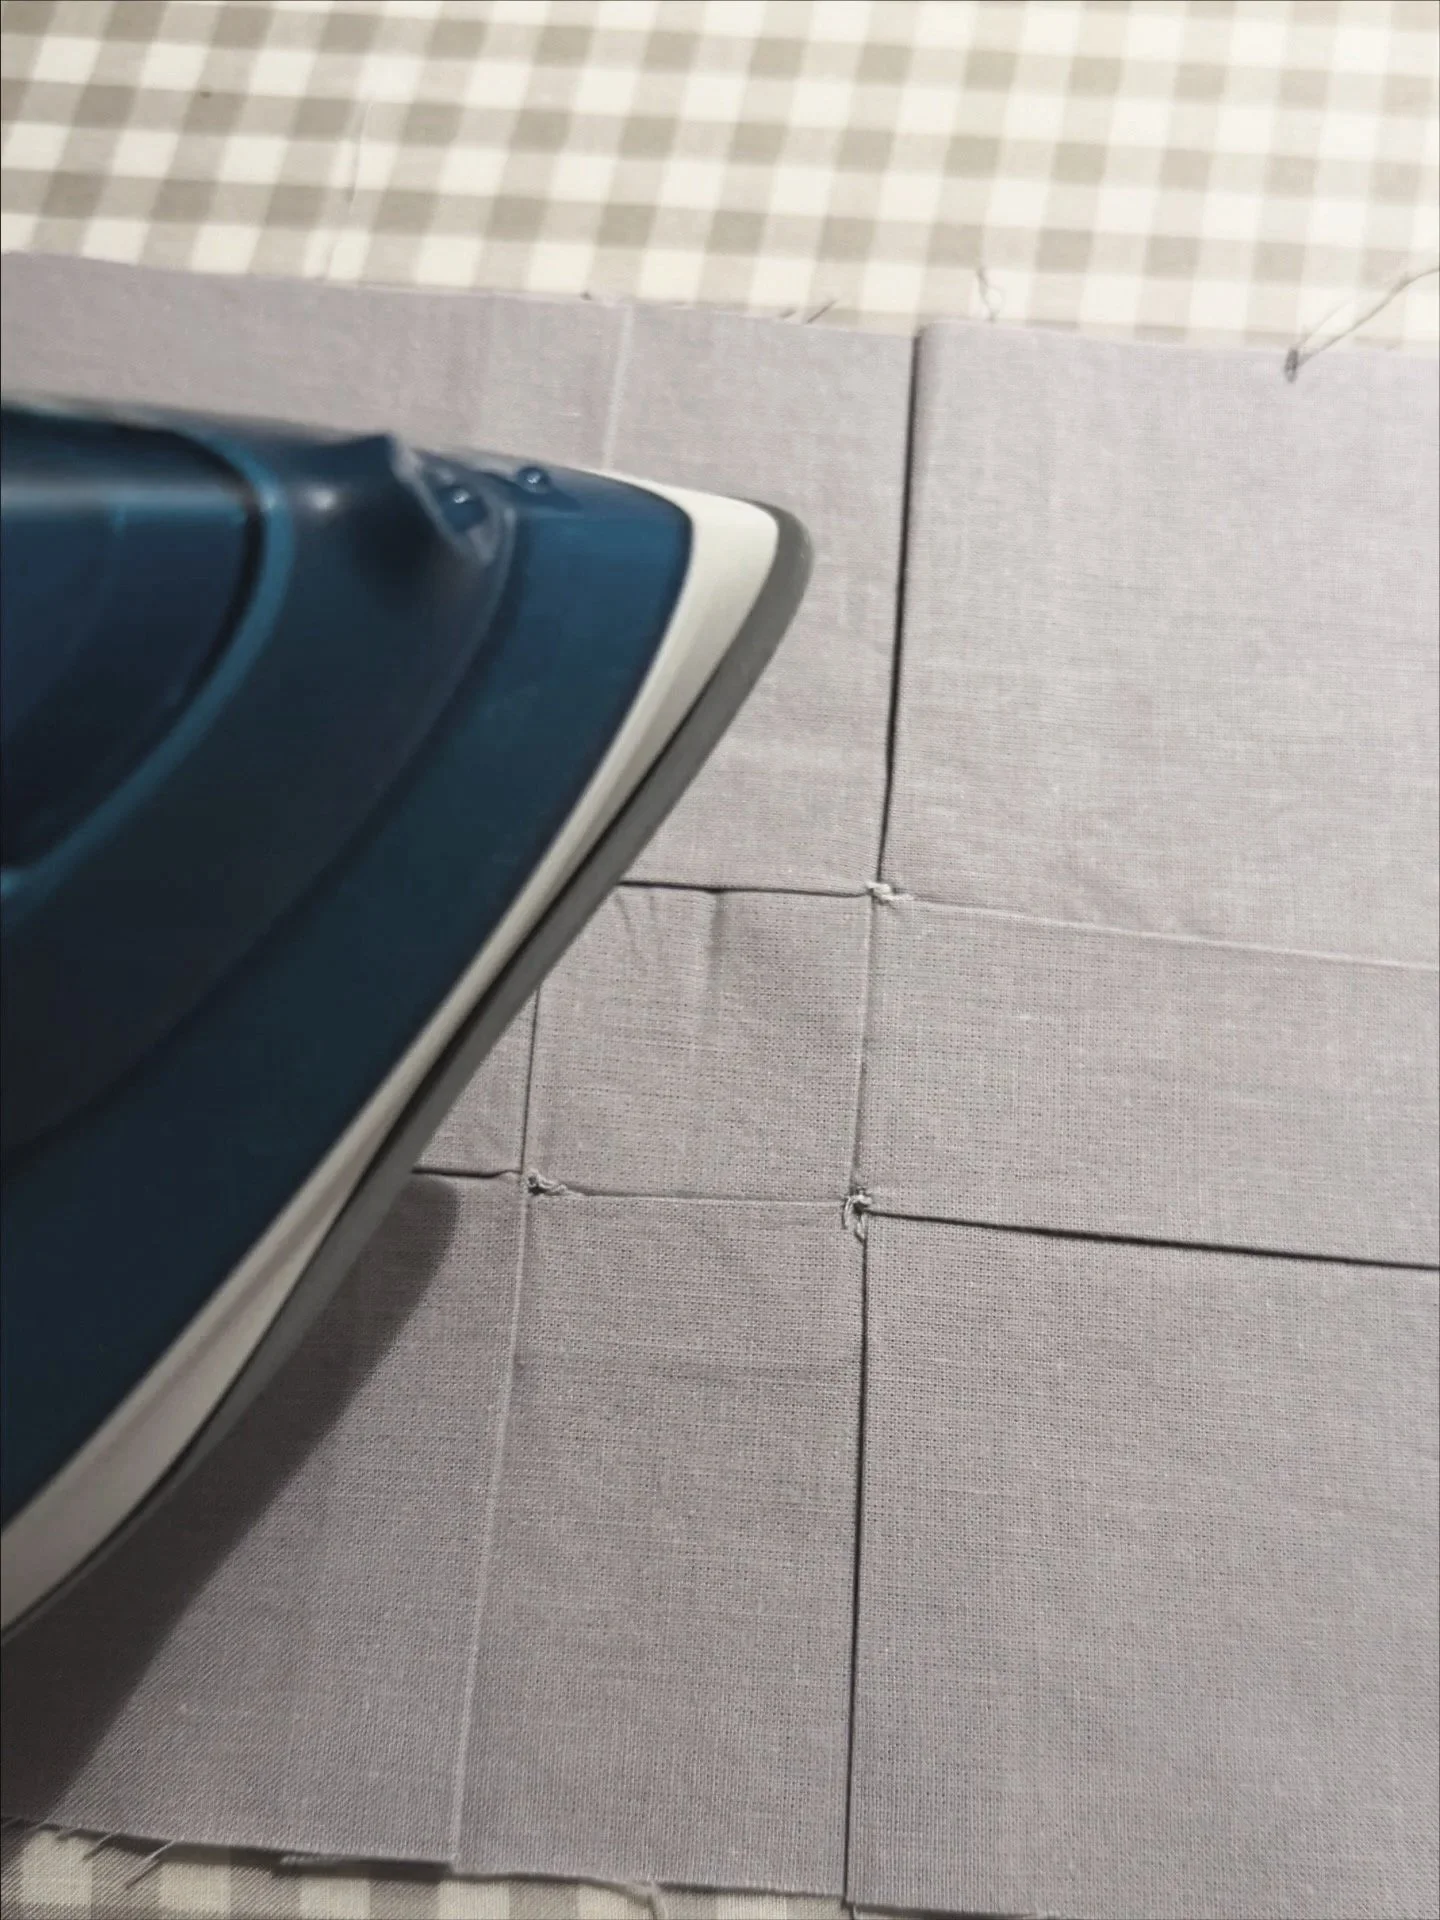
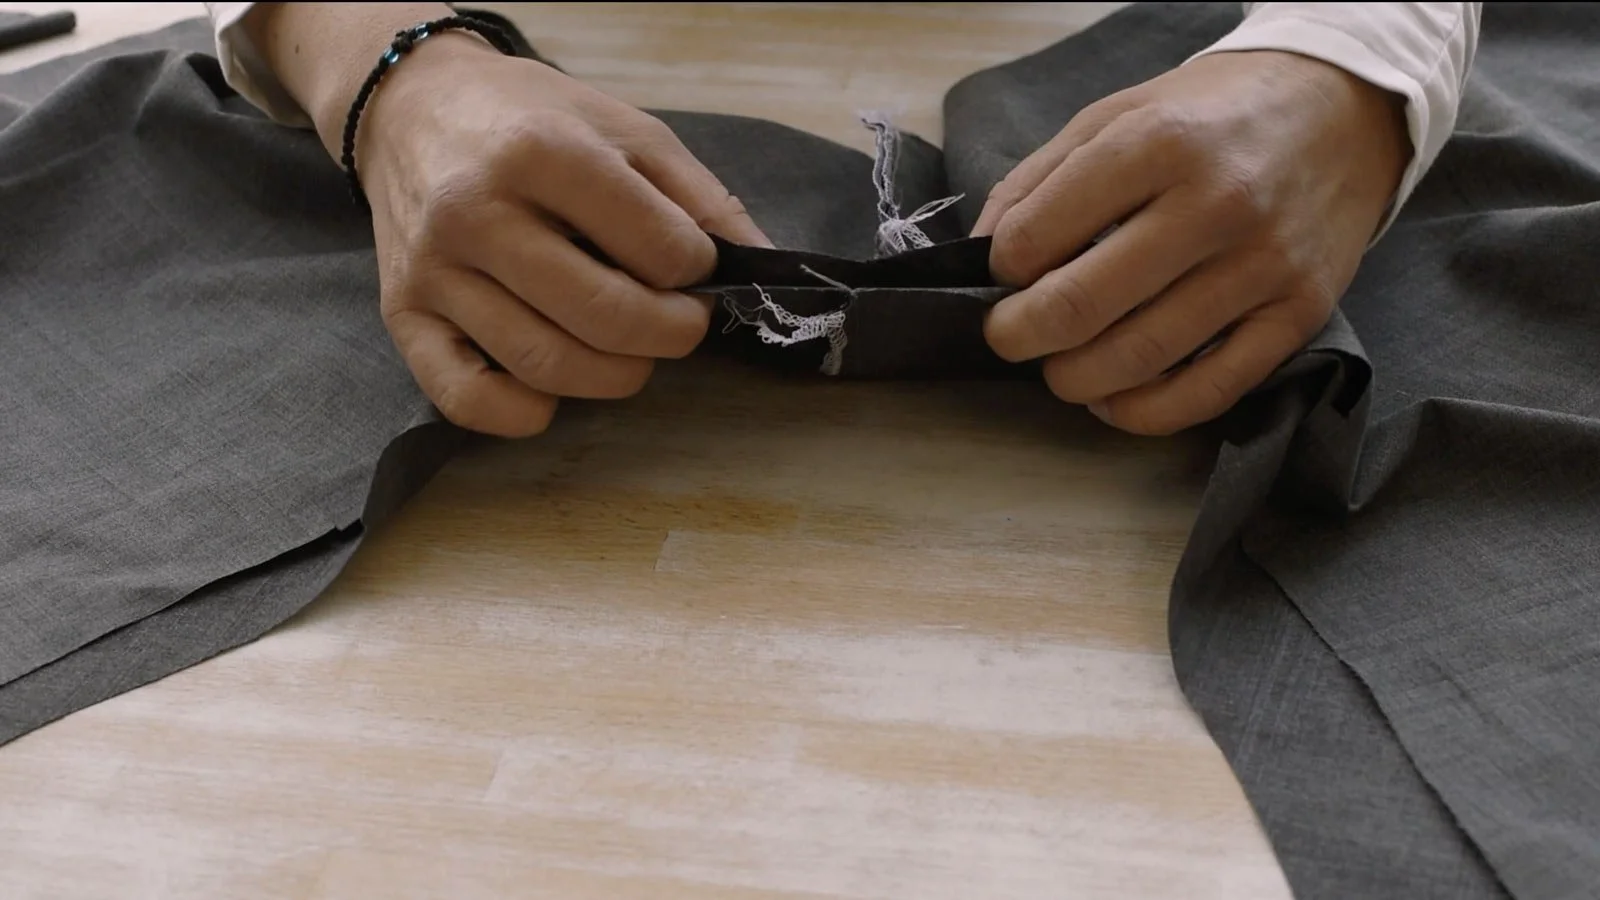
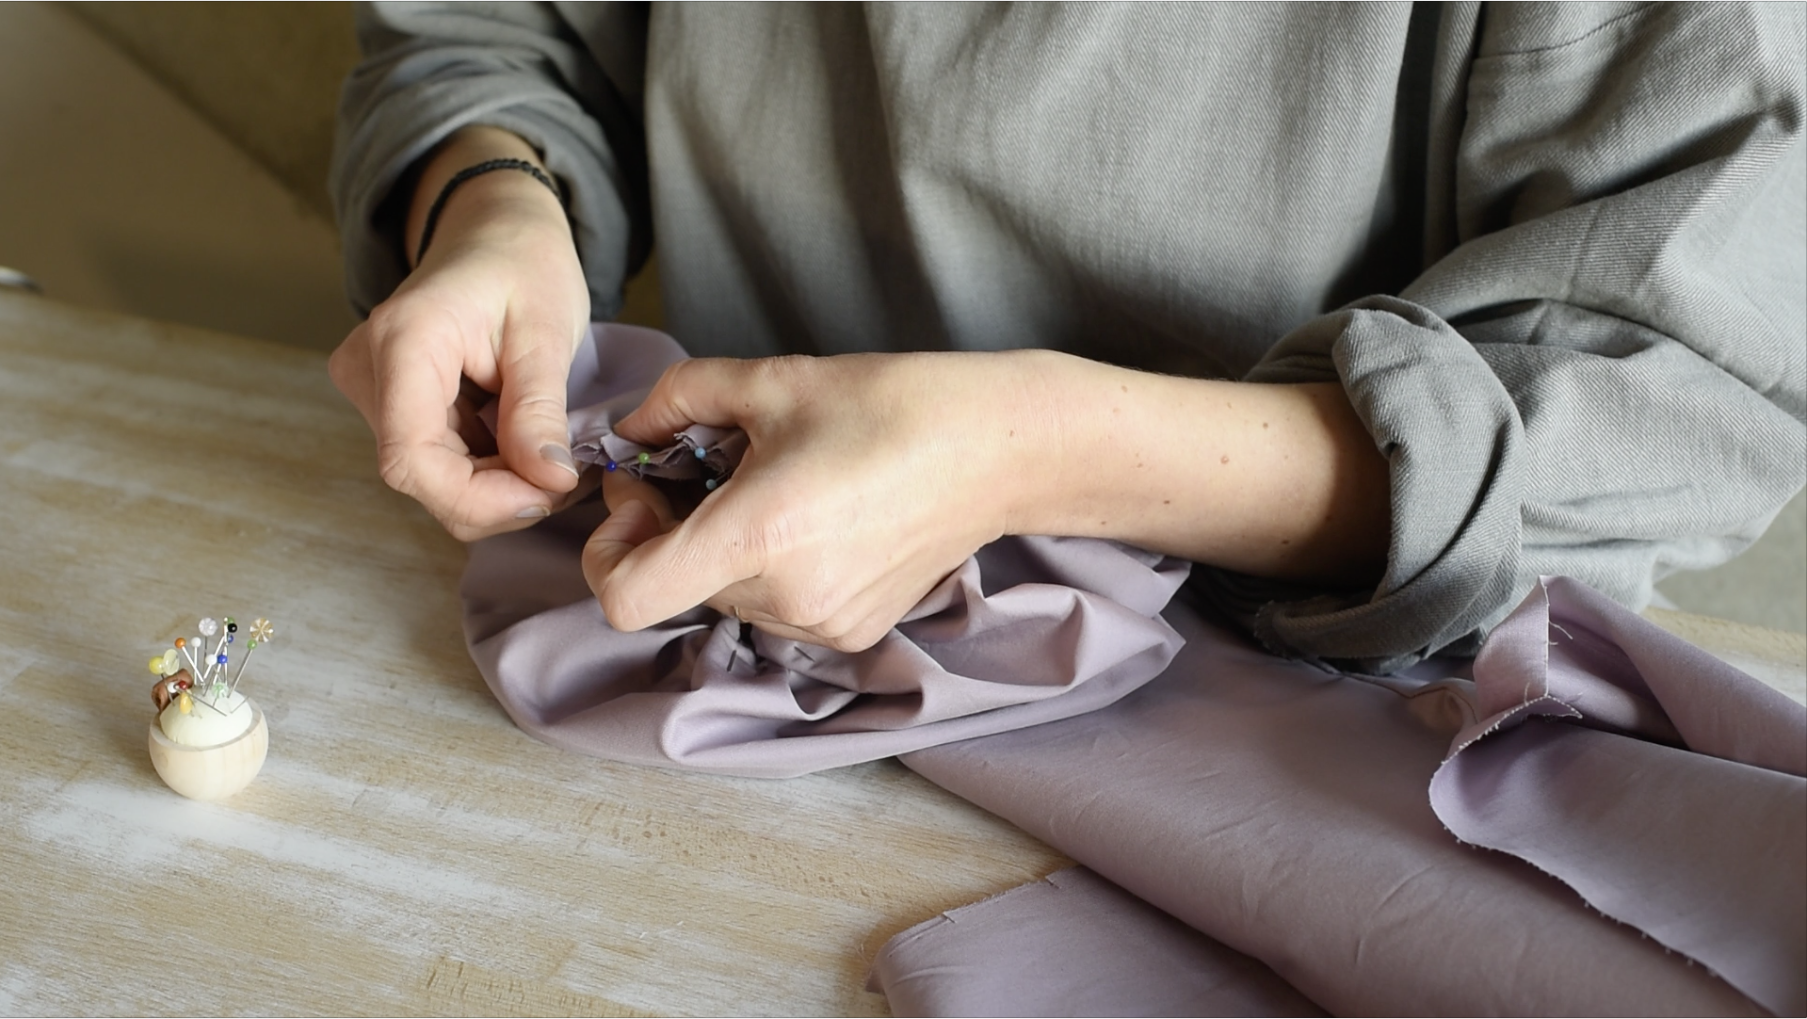
PART 3: Preparing the pieces. Applying interfacing, sewing buttons and making the pleats and darts.

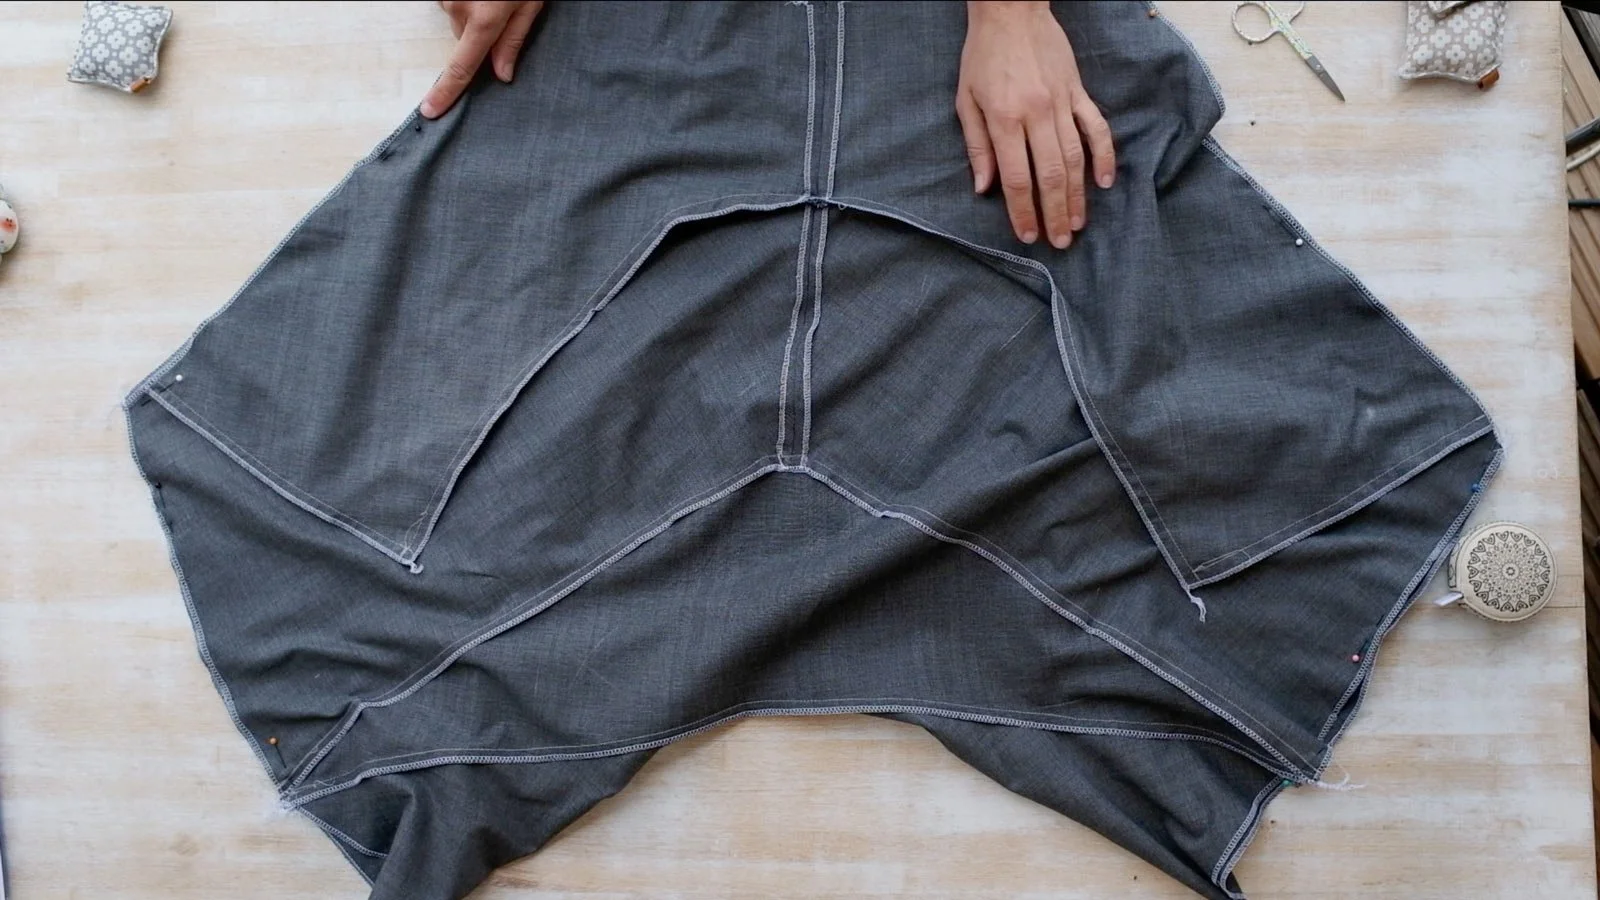
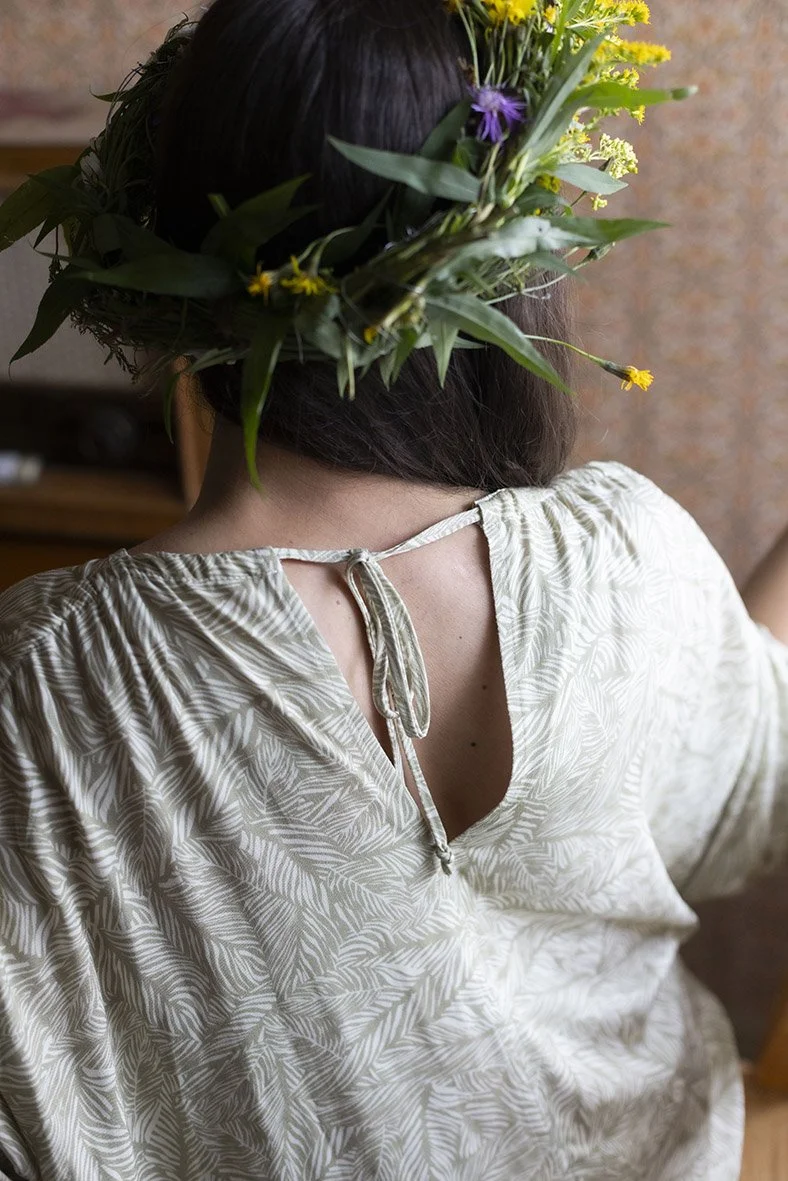
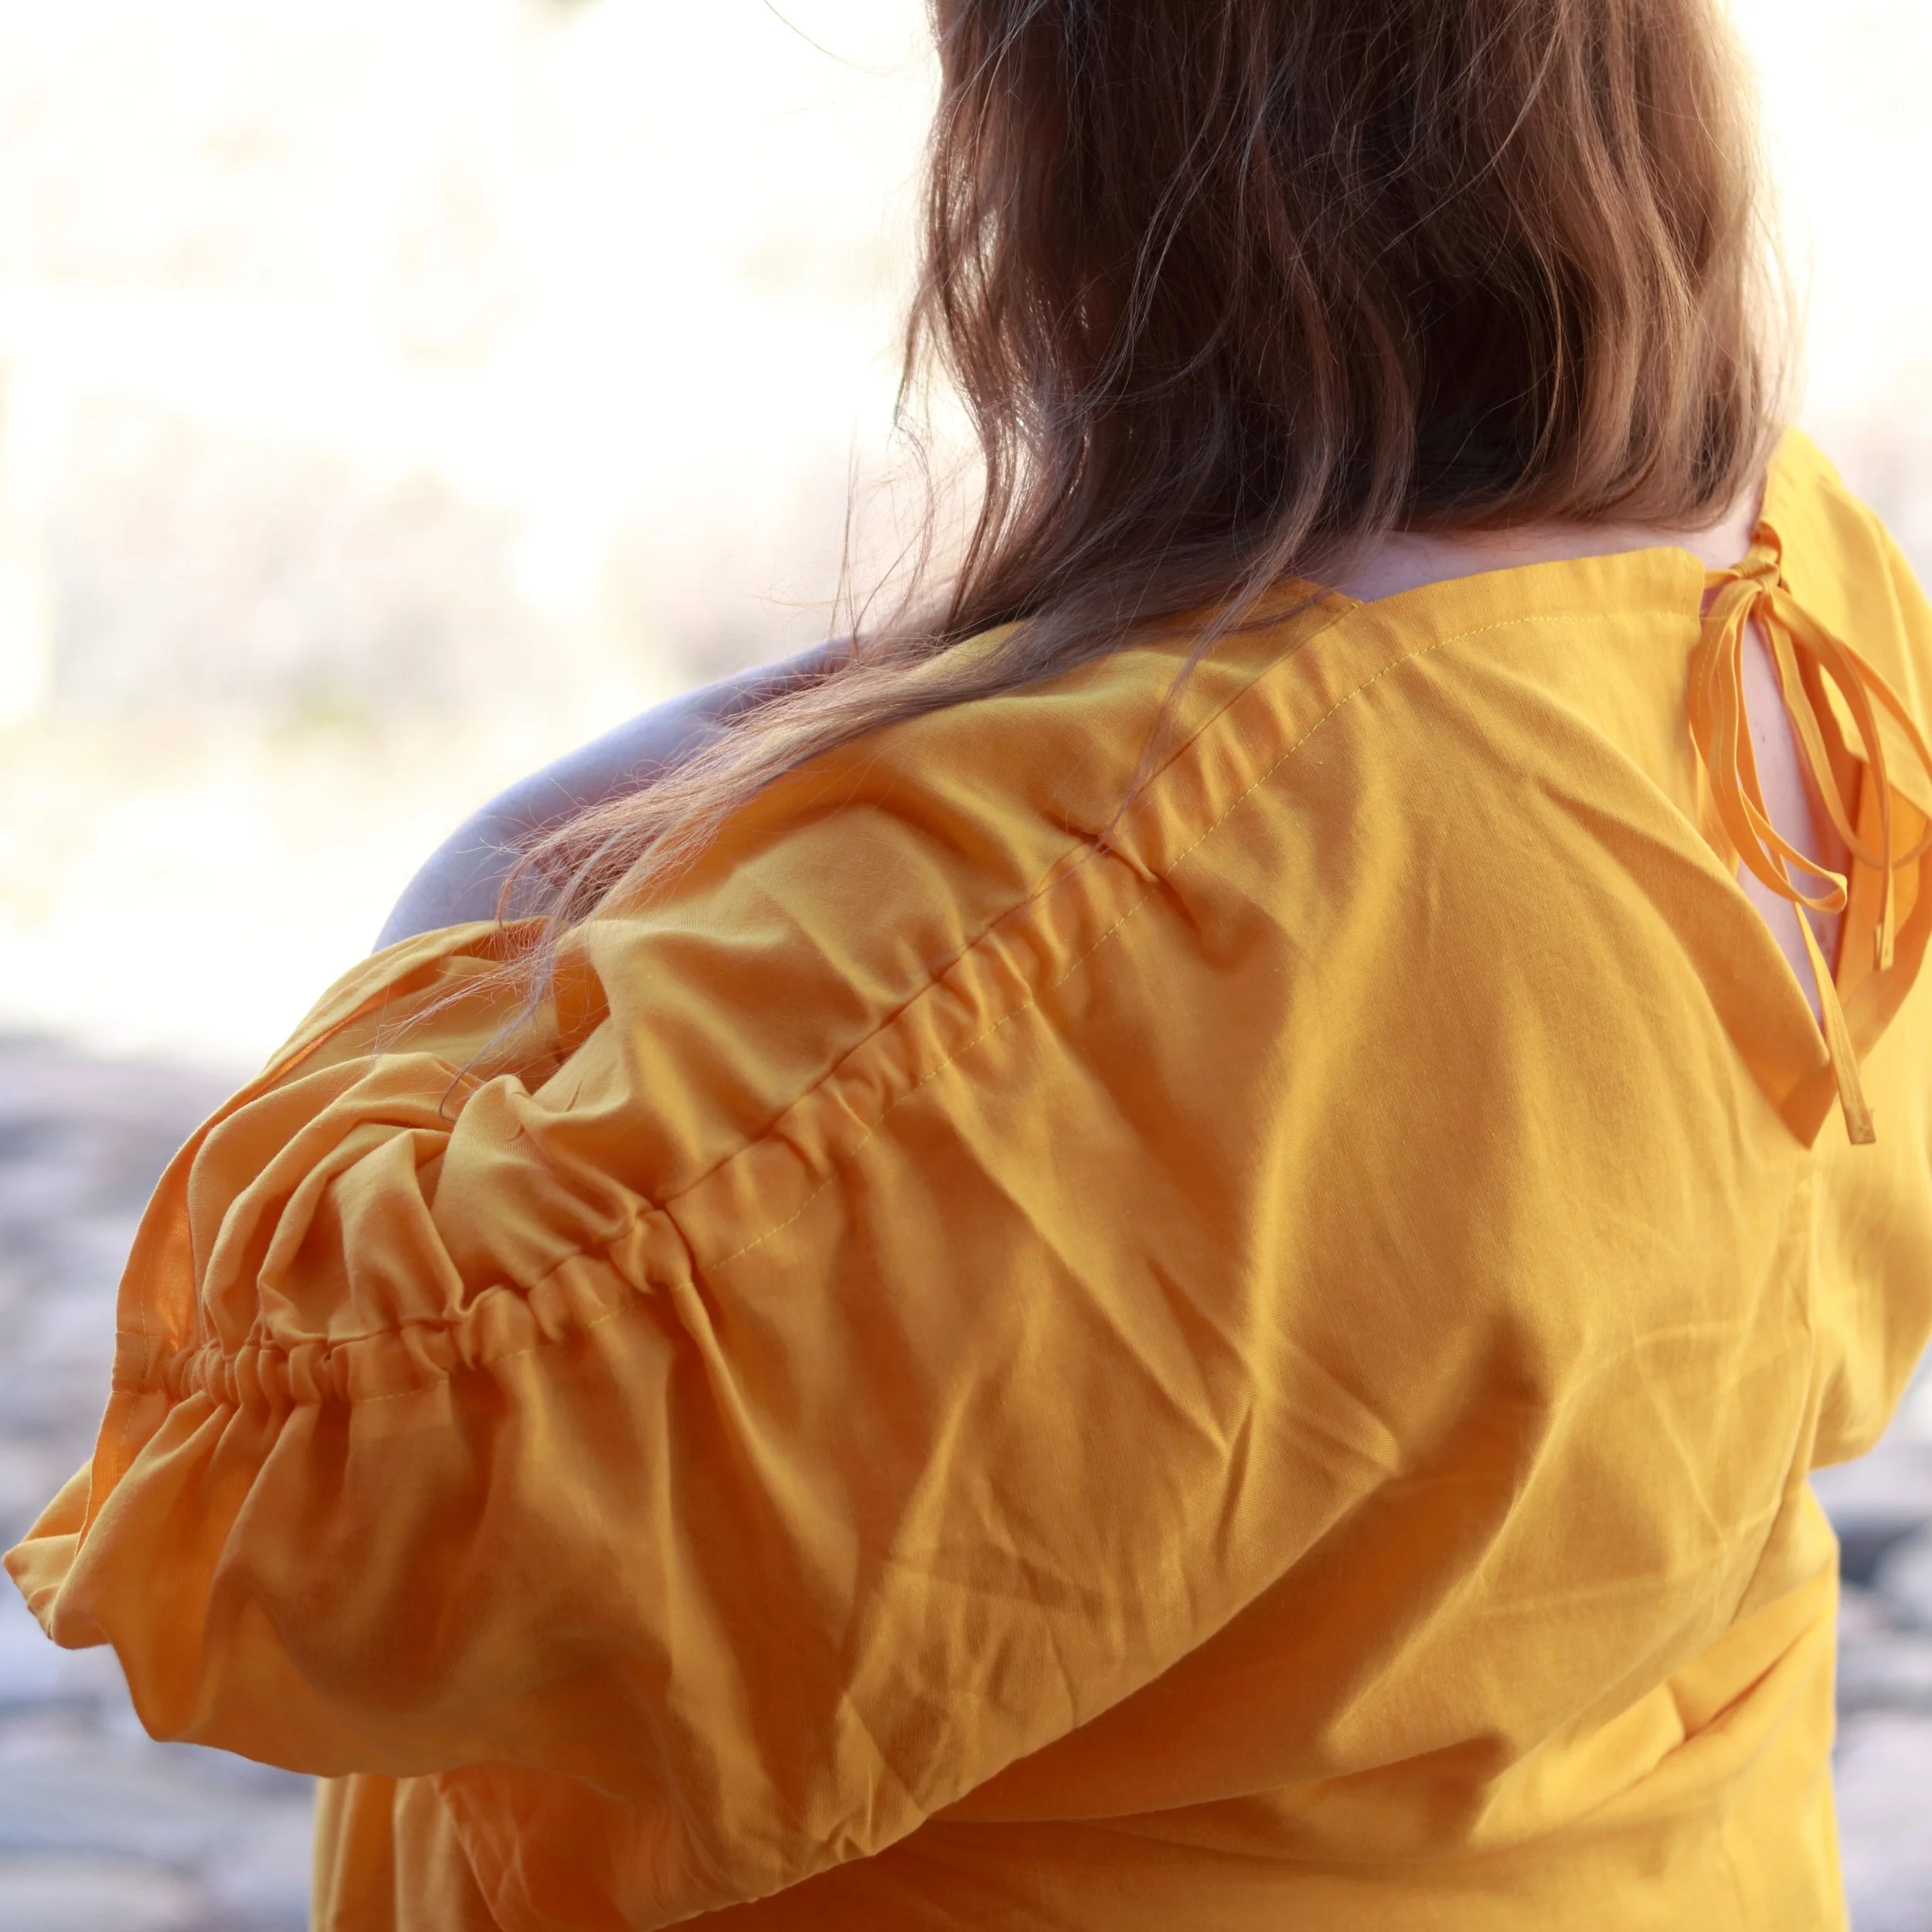
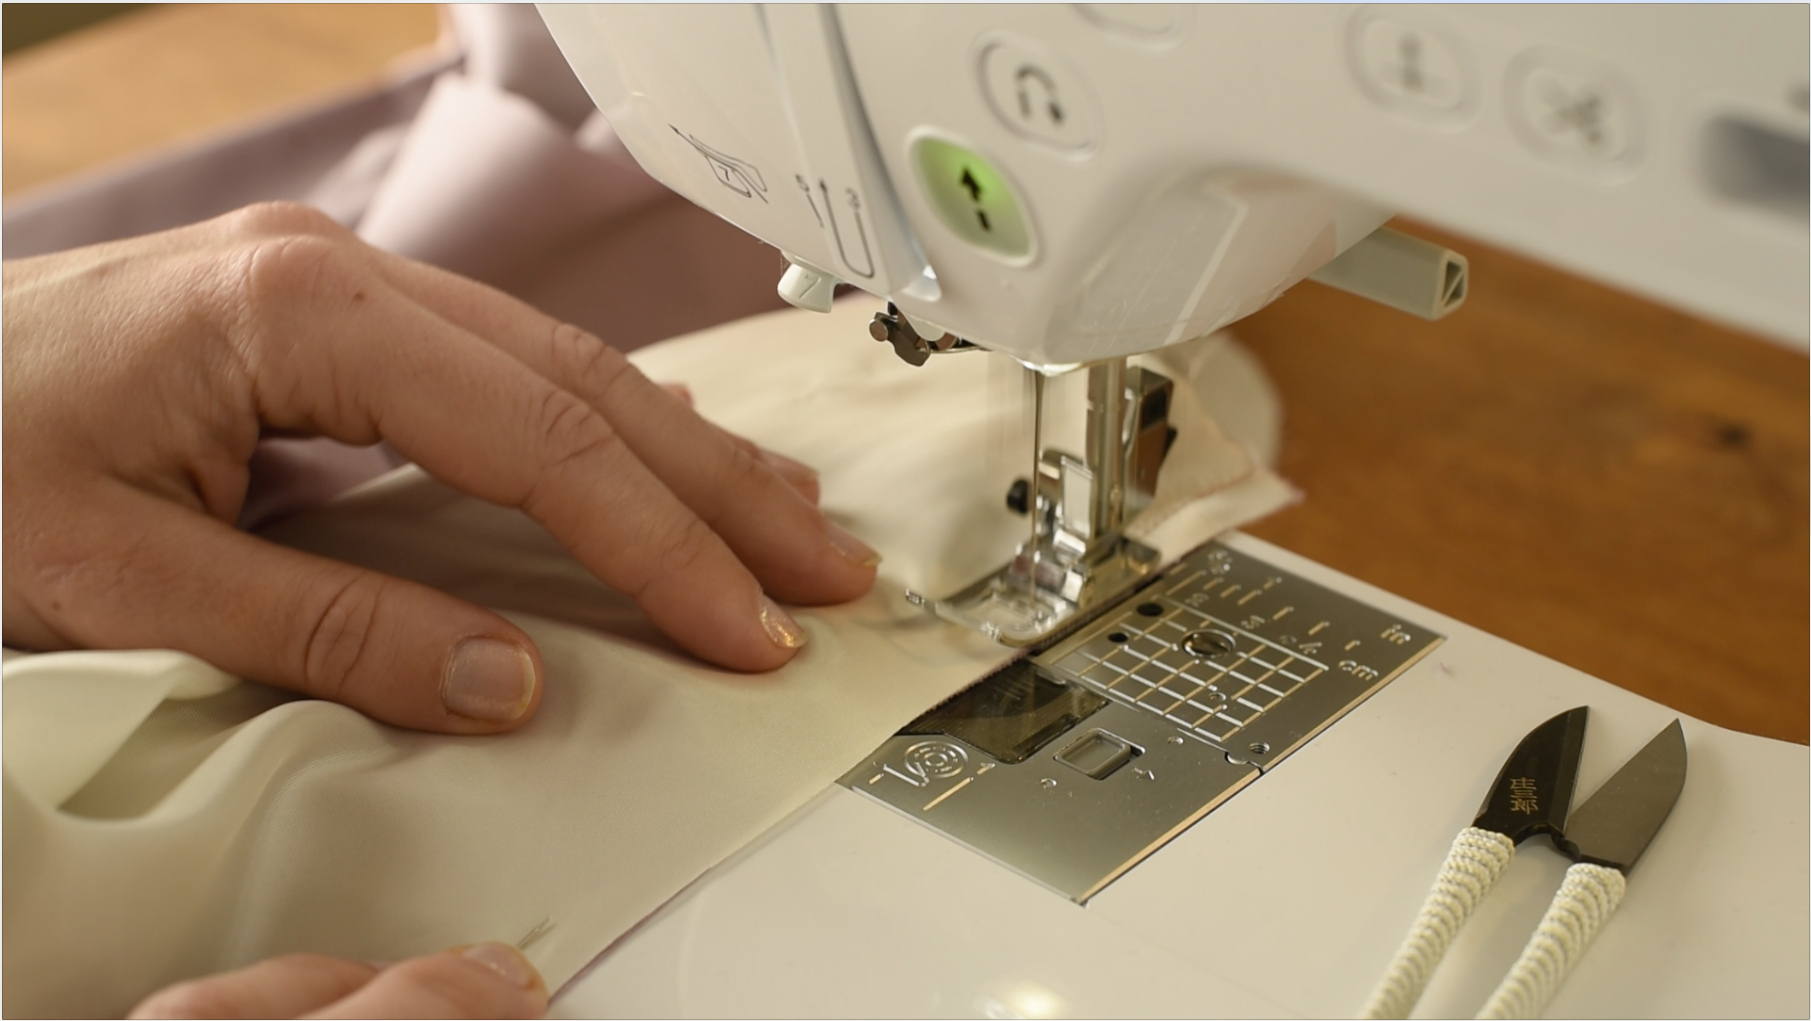
PART 4: Bodie Assembly. Sewing the lining and main fabric bodice pieces together, creating the magical pleats for the puffy sleeves and combining the lining with the bodice.

PART 5: Skirt assembly. Pockets, the front vent and lining will be done in this part.

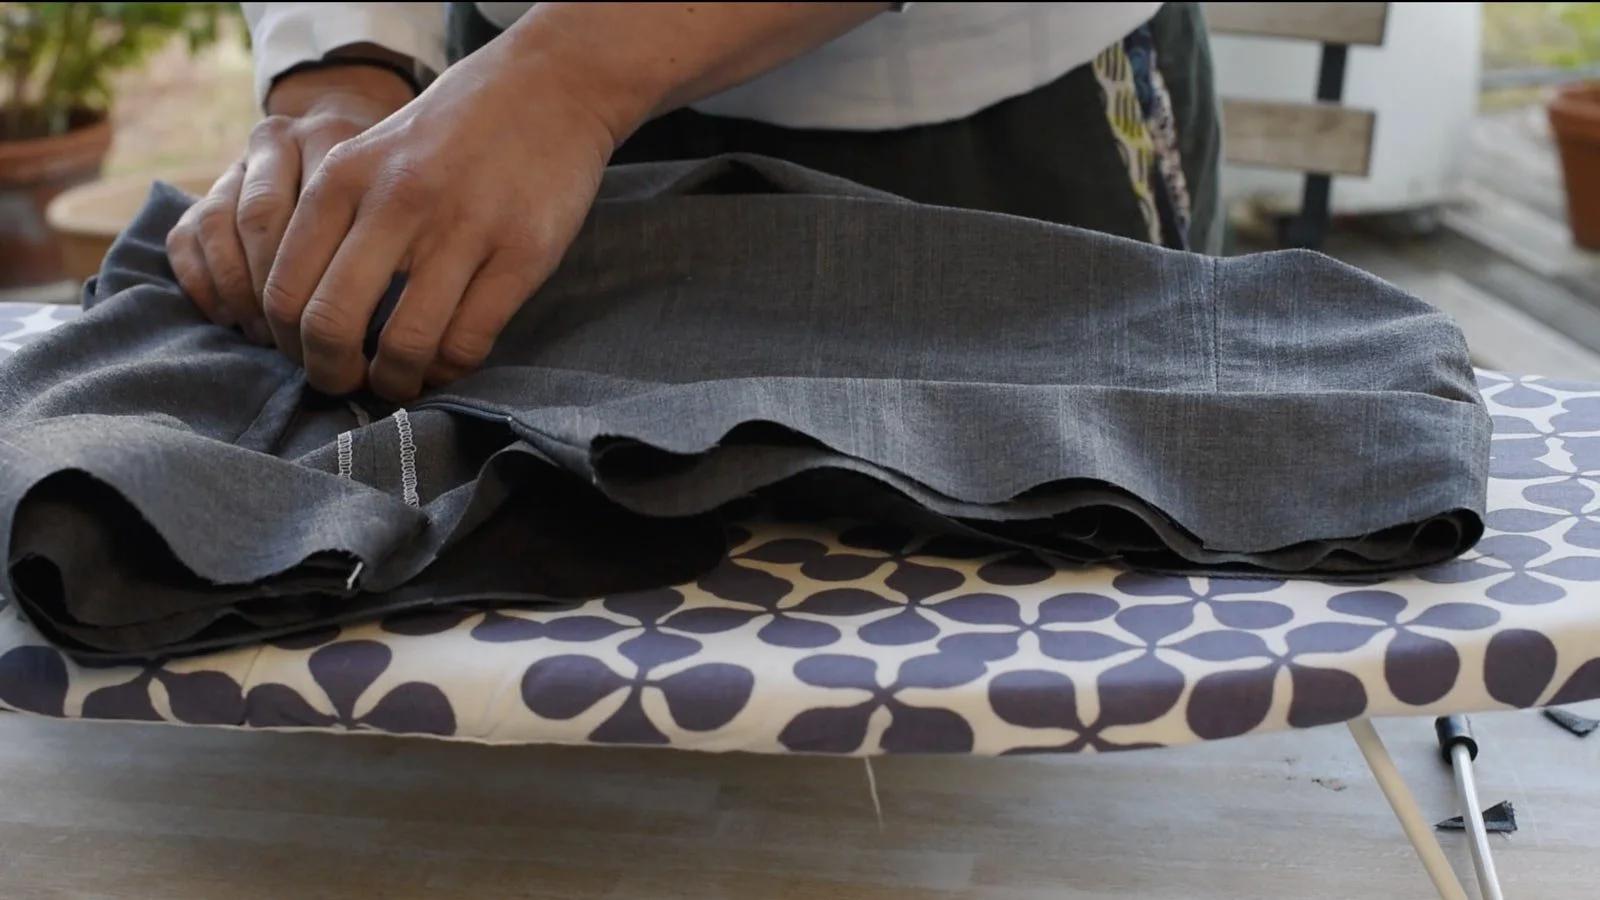
PART 6: Making it a dress! This last part includes the final steps for making your AURELIA dress.


You can get the AURELIA dress pattern from TAUKO Magazine issue No.6 (also available with digital version included) or as a layered and tiled PDF pattern. During Spring 2023 we are encouraging the community to join the sew along by posting AURELIA projects to instagram feed using the hashtag #TAUKOaureliadress. The sew along challenge continues until the end of May 2023 and it is sponsored by some of our favorite brands.


Thank you!

Camera: Marei Wenzel
Sound: Till Bovermann
Music: Litku Klemetti
Our lovely sponsors: Brother, Cohana, Gütermann, Fiskars & METERMETER


Weekend Sewing: VERTEX Trousers

Join me as I sew the VERTEX trousers, designed by Alex Schaufele for our DENIM issue! With hip darts for a relaxed, effortlessly cool fit and multiple waistband options, this pattern lets you create anything from 1980s-inspired jeans to a polished office look.

I’m in love with my version—especially the topstitched back details! I hope you enjoy making your own VERTEX as much as I did.

— Mila Moisio, Editor-in-Chief, TAUKO Magazine


Learn how to make your VERTEX trousers in this 20 minute tutorial video:

My size:

I made my VERTEX in a size 3, although I would normally make a size 2, as I really like my trousers a bit looser on the waist. The legs are a bit long, but I really like folding them up, so I kept the length. NOTE: There is mistake in the measure chart of the first edition print copy of TAUKO Magazine issue No.14. Check the errata to choose the right size before you start.

My version:

I made the shaped back waistband, which allows you to channel 1980s jeans. For the front I used the plain waistband, while the buckle waistband option is also super cool! The different waistband options can be mixed and matched however you wish to fir your personal taste and skill.

Loving this shaped back waistband!

My hacks and modifications:

  • I made the inner waistband out of a different fabric, and created the front pocket facings by cutting the pocket bags out of batist lining.

  • I moved the back pocket placements slightly to the side.

  • I topstitched the lower edge of the inner waistband with a folder finish (the original pattern calls for a stitch in ditch and a serged waistband finish).

I used medium weight denim from my stash, so I had to make extra seams for the front and back legs.

I made the front pocket openings a little smaller with topstitching.


Meet the designer!

Alex Schaufele’s experiences growing up in a family that wore denim for work and play shaped her view of what makes a great pair of jeans. As an adult managing gallery spaces, she often searches for and struggles to find aesthetic utility garments. Designing VERTEX was an opportunity to combine her childhood observations with her current wardrobe needs. Inspired by vintage trousers and contemporary designer garments, the VERTEX jeans are a choose-your-ownadventure sewing opportunity. With distinctive hip darts supporting generous front pockets and four possible waistband combinations, VERTEX can be dressed up or made more casual. Channel the 80s with stonewashed denim and a shaped back waistband, or go for a dark wash and a belted waistband for the office.


You can get the pattern for making your VERTEX trousers pattern from the print magazine, TAUKO Magazine issue No.14 or as a PDF pattern.

Available as PDF pattern and included in the TAUKO Magazine issue No.14


To understand all you can do with this pattern, check out the community's creations and find the inspiration to make your version. We'd love to share your project, so please tag us @taukomagazine and #taukovertex and send us photos of your make to magazine@taukodesign.fi to be featured!

VERTEX by Emy _ @Miss_bortolot.jpg


Folding Fabric Like Paper: The Magic of 4-Point Diamond Smocking 

There is something wonderfully surprising about how fabric can transform into a beautifully faceted diamond texture, achieved with just a bit of marking, hand-stitching, and pulling four points together on the wrong side. It is the technique known as 4-point direct smocking.

What I love most is how sculptural it becomes with almost no effort. Each time four dots meet on the underside, the right side blossoms into a raised diamond. Clean, crisp and architectural. And the best surprise? The back of the work forms its own woven-looking pattern, like a quiet little secret only the maker gets to see.

Traditionally, you would finish this technique with a very gentle steaming, allowing the folds to relax into soft, rounded diamonds. Personally, I prefer to press it firmly with an iron. The heat and pressure sharpen the angles and turn each motif into a tiny, paper-like facet. Suddenly the fabric behaves like something between cloth and origami.

It’s a small reminder that fabric isn’t flat. It just waits for the right tug or fold to show its hidden shapes. And sometimes, a simple four-point gather is all it takes to turn a textile into a tiny piece of art with endless variations, perfect for adding structure to garments like the DIA Jacket.

Réka MacDonald, designer


Diamond smocking:

1. Using a fabric marker and ruler, create
a 1.6"/4 cm grid on the wrong side of the rectangular panels.

2. Identify the four dots that form the gathering points of one diamond. Pick up your needle and thread and use double strands of thread with a knot at the end.
Anchor the first dot at the bottom left with double stitching, then connect the three pairs of dots in the sequence “top right, top left, and bottom right” to form the diamond.

3. Gently pull the thread to gather the fabric, securing the final stitch with a knot after stitching into the gathering point a couple of times. Make sure that no fabric is trapped inside. If this happens, cut the thread and redo the stitches.

Making the stitches


4. Repeat the pattern, working systematically across the grid to stitch each diamond. Ensure consistent tension for a neat and uniform appearance.


5. Tuck in the folds created by stitching, pushing them to the right side of the fabric to create a woven texture on the wrong side.


6. On the right side of the fabric, press and shape the diamonds first by hand and then with a steam iron.


7. Topstitch the folds as evenly as possible to secure them. This will make it easier to reshape after washing.


Hungarian-British designer Réka MacDonald draws inspiration from the structural elegance of origami, combining traditional folding techniques with contemporary design. Her design for TAUKO No. 17 DIA explores the expressive potential of smocking. With its intricate folds and tactile surfaces, smocking evokes the meditative pleasure of folding paper. The design invites playful interaction through variation: different-sized or coloured beads can be used instead of traditional topstitching to secure the folds, adding texture and fun to the making process. The plain version allows you to experiment with different fabrics.


Leija Trousers Sew Along

Welcome to the Summer Sew Along! During the summer of 2023, Mila will be making her favourite summer garment, the Leijat trousers, from recycled textiles. In the different parts of this sew along she will show you how to change the pattern between sizes and how to sew the trousers step by step. There is also a special section dedicated to recycled materials and how to work with them.


WELCOME! I’ll be sewing my pair of Leija trousers on our terrace using old bedlinen. I hope you’ll have lots of fun sewing along with me. –Mila

PART 1: What you need. This is a great checklist to see that you have everything you will be using.

PART 2: Fit & Size. How do you choose the size you want to make? In this part of the sew along I will give tips on how to find the size that feels best. It's not just about measuring yourself, but also looking at some of your old favourite garments and their measurements.

PART 3: Finding and altering the patterns. In which formats can I find the LEIJA trousers patterns? I will be working with the traced patterns from TAUKO Magazine issue no. 7 and I will show how to change the pattern if you are between two sizes.

PART 4: Working with recycled textiles. The story of LEIJA trouser designs has its roots in Finnish bed linen! In this video I’m sharig some tips from working with recycled textiles for fashion for over 10 years and now making Leija trousers from old bed linen.

PART 4: Front. Now it's time to start sewing the LEIJA trousers! The first step is to assemble the front with the large pockets.

PART 6: Back. In this part the back pieces are sewn together one by one.

PART 7: Combining. Once the front and back are assembled, it is time to sew them together. This part also includes making the trouser legs.

PART 8: These are the final steps in making LEIJA trousers. There are as many ways to sew a zip and waistband as there are makers, but I hope you'll find inspiration or relief in this part.


You can get the pattern for making your LEIJA trousers from the printed sewing magazine, TAUKO Magazine issue No.7 or as a PDF pattern.

Available as PDF pattern and included in the TAUKO Magazine issue No. 7


During summer 2023 we are encouraging the community to join the sew along by posting LEIJA projects to instagram feed using the hashtag #TAUKOleijatrousers.

Photo by Melissa Weismann <3. Share your makes #taukoleijatrousres


In collaboration with: Brother, & Pony needles

Thank you!
Camera: Marei Wenzel
Sound: Till Bovermann
Music: Litku Klemetti


Thank you!

Camera: Marei Wenzel
Sound: Till Bovermann
Music: Litku Klemetti
Our lovely sponsors: Brother & Pony Needles


HIUTALE Dress Tutorial: Making for Someone Special

Join me in this tutorial where I sew the HIUTALE dress, a design I created together with my mother-in-law for her 80th birthday. Available in TAUKO Magazine No.16 and as a single PDF, this pattern is my way of making something truly meaningful for someone very dear to me.

— Mila Moisio, Editor-in-Chief, TAUKO Magazine


Learn how to make your HIUTALE dress in this 8 minute tutorial video:

Merino wool knit dress with 3/4 sleeves:

I made the HIUTALE dress for Bernhild in a size 4 from medium-weight, soft, mulesing-free merino wool jersey (235 gsm). The idea behind the dress was to create an everyday garment from wool knit with a delicate collar, no seams on the neckline and a hem that just covers the knees. The slits create a polished finish and make the overall look a bit lighter. You can use any medium-weight knit for your design, but my favourite of the three different versions I've made so far is the merino wool version for Bernhild!

Notes:

  • Remember to use knit interfacing when working with knits!

  • I learned my self to create mitered corners only after finishing with the HIUTALE for Bernhild. I would recommend you to give this a try with the slits. The instructions are included with the pattern in issue No.16 (p.86) and with the PDF pattern.


You can get the pattern for making your HIUTALE dress pattern from the print magazine, TAUKO Magazine issue No.16 or as a PDF pattern.

Available as PDF pattern and included in the TAUKO Magazine issue No.14


To understand all you can do with this pattern, check out the community's creations and find the inspiration to make your version. We'd love to share your project, so please tag us @taukomagazine and #taukohiutale and send us photos of your make to magazine@taukodesign.fi to be featured!

HIUTALE by Bernadette @sewknitmakebe


LOUVRE Beret Tutorial: Zero Waste Design By Liz Haywood

#taukolouvre made by @girlbytheseaslowfashion, @madewithcwtch, @jessicawaldegar & @candylovestosew

Watch this LOUVRE Beret tutorial by Australian designer Liz Haywood!

A true pioneer in zero-waste patterns, Liz has written sewing books, taught sewing, and worked in the fashion industry as a professional pattern maker. Her creativity, the skills she has acquired throughout her career, and her wonderful sense of humour are evident in her work. The LOUVRE is a beautiful example of this.


Watch this video to learn how to make a LOUVRE beret:

Zero Waste Pattern Using Your Scraps

This is a tutorial video for making the LOUVRE Beret, designed by Liz Haywood. The pattern is featured in issue No. 16 of TAUKO magazine, which has the theme of architecture, and is also available as a single PDF pattern.

The video includes all the steps: choosing a size and fabric; preparing the pattern; cutting out; stay-stitching; sewing the darts; assembling the pieces (with special tips for checks and stripes); pressing the pieces; sewing the two halves together; uniting the lining and outer; basting the raw edges together; binding; and finishing the beret.


You can get the pattern for making your LOUVRE beret pattern from the print magazine, TAUKO Magazine issue No.16 or as a PDF pattern.

Available as PDF pattern and included in the TAUKO Magazine issue No.16


To understand all you can do with this pattern, check out the community's creations and find the inspiration to make your version. We'd love to share your project, so please tag us @taukomagazine and #taukolouvre and send us photos of your make to magazine@taukodesign.fi to be featured!

LOUVRE by Jeanique _ @madewithcwtch

LOUVRE by Jeanique @madewithcwtch


KIDE Blouse Tutorial: Gift Pattern for TAUKO Subscribers

This blouse comes together in just a few hours, a true quick win for your sewing table. Created exclusively for our subscribers as a gift, it’s soft, easy to sew, and designed to bring a touch of instant satisfaction to your winter making.

— Mila Moisio, Editor-in-Chief, TAUKO Magazine


Learn how to make your KIDE blouse with short tutorial video:

A round-neck knit blouse with facings and a clean, rib-free finish:

This design is something I’ve been longing for, a piece I kept wishing I had, simple, soft and effortless. KIDE is wonderfully quick to sew: the basic version can be finished in about an hour if you’re experienced. It has gently dropped shoulders, a slightly nipped-in waist and a curved hem that gives it a relaxed yet defined shape. It’s drafted for knits, but its relaxed silhouette means you can play with wovens too.

My own blouse is made from Organic Velvety (100% organic cotton, 255 gsm) by MeterMeter, with facings in Interlock Cotton Knit (95% organic cotton, 5% elastane, 270 gsm) and H609 knit interfacing for support. MeterMeter kindly sponsored these beautiful fabrics.


Meet Our Wonderful Subscribers


Maker’s diary: NIETOS by Mila Moisio

Welcome to follow the making of a fully lined winter coat, NIETOS, through a maker's video diary! Over four days of making, I will be tracing patterns, cutting tons of fabric, quilting, hacking, assembling, unpicking, having lunch and walking our dog. These daily records will guide you step by step in making your own version of the NIETOS coat. It is a project that takes time and patience. However, I encourage everyone to take up the challenge, as it will reward you with learning a range of new skills and having a winter coat of your dreams for years to come! - Mila Moisio, Editor-in-Chief of TAUKO magazine


DAY 1:
I will be enterting to the pattern party to find my path and cutting all three different fabrics used in my project.


DAY 2:
Quilting the padding and starting the assembly

It's getting chilly and time for day 2 of making the fully padded and lined winter coat #taukonietos with Mila! This day includes a lot of stitching to add the padding to the pieces of coat fabric, and a delicious recipe for making borsch soup. What more could you want?


DAY 3:
Zipper, placket, facings and all other tricky parts

On the 3rd day of making the #taukonietos coat, I'm diving into the assembly of the NIETOS coat! That's me:
✔️ Assemble the coat pieces
✔️ Add the zip, hood and lining
✔️ Take the first steps to assemble the lining

Plus a little lunch break to enjoy some delicious falafel at a local Berlin Imbiss. Come along for the process, the progress and the little joys of making!


DAY 4:
Fininshing with the lining and attaching it

I’ve reached the final steps of making the #taukonietos coat, and there’s nothing more rewarding than moving into this phase. Today, you’ll learn the tricks and techniques that bring everything together. Join me to discover how the magic happens and see a winter coat come to life, ready to wear!


You can get the pattern for making your NIETOS coat from the print magazine, TAUKO Magazine issue No.13 or as a PDF pattern.

Available as PDF pattern and included in the TAUKO Magazine issue No.13


The NIETOS pattern has variations for making either a coat or a jacket, one being the fully lined one I'm making and the other a cropped unlined parka for in-between seasons. To understand all you can do with this pattern, check out the community's creations and find the inspiration to make your version. We'd love to share your project, so please tag us @taukomagazine and #taukonietos and send us photos of your make to magazine@taukodesign.fi to be featured!

NIETOS by Katrin @girlbytheseaslowfashion

NIETOS by Nadine @nadsches

NIETOS by Heike @h.e.i.m.werk


Thank you!
Fabric sponsoring: Ecological textiles
Edit of the video: Billie Oanh


Thank you!
Fabric sponsoring: Ecological textiles
Edit of the video: Billie Oanh


ADELE Rose Tutorial: Accessory Design By Stephanie Kroth

Watch the ADELE rose tutorial and create your own rose garden for years to come!


The ADELE boutonnière is a decorative accessory that adds character to your everyday outfits. Though traditionally worn by men, the boutonnière offers a way to make a style statement and add a touch of creativity and charm to any wardrobe. This is the perfect project for beginners, enabling you to put your fabric scraps to good use.

Spread some joy by gifting a friend a handmade rose!

You can attach ADELE to structured garments such as jackets or coats, or to woven fabrics, and it will hold its shape and stay in place thanks to discreet pins. Delicate knits are less suitable, as the flower needs a solid base to support it.


You can get the pattern for making your ADELE rose pattern from the print magazine, TAUKO Magazine issue No.17 or as a PDF pattern.


To understand all you can do with this pattern, check out the community's creations and find the inspiration to make your version. We'd love to share your project, so please tag us @taukomagazine and #taukoadele and send us photos of your make to magazine@taukodesign.fi to be featured!

ADELE by Hanna @is.this.sustainable


ROO Pocket Tutorial: Zero Waste Design By Liz Haywood

Watch this ROO Pocket tutorial by Australian designer Liz Haywood!

Liz Haywood is a former industry pattern maker who enjoys home sewing. For her, pockets are essential feature for any garment and an important part of living on a rural property. She never leaves the house without a pocket knife, a handkerchief, and a hair tie - and she never wears clothes without pockets! The ROO hanging pocket was designed to provide pockets for clothes that don’t have them, or replace the pathetically small pockets found on others. It was inspired by historical tie-on pockets that women wore under their clothes. Liz’s modern version is a gusseted, cargo-style pocket designed to be worn on the outside.


Watch this video to learn how to make a ROO pocket:

Zero Waste Pattern Using Your Scraps

This tutorial video walks you through making the ROO Pocket, designed by Liz Haywood. The pattern is featured in TAUKO Magazine Issue No.18 (our Pockets issue) and is also available as a standalone PDF pattern.
The video covers every step of the process: choosing your fabric, preparing the pattern, cutting, stay-stitching, assembling the pieces, and attaching the ties — making it easy to follow from start to finish.


You can get the pattern for making your ROO pocket pattern from the print magazine, TAUKO Magazine issue No.18 or as a PDF pattern.

Digital PDF Pattern for Sewing Pocket

Available as PDF pattern and included in the TAUKO Magazine issue No.18


To understand all you can do with this pattern, check out the community's creations and find the inspiration to make your version. We'd love to share your project, so please tag us @taukomagazine and #taukoroo and send us photos of your make to magazine@taukodesign.fi to be featured!

ROO by Dominika @baste_it


TAMI Bag Tutorial: Origami-Inspired Design By Regina Winther

Watch this TAMI Bag tutorial by designer Regina Winther!

Regina Winther lives and works in Hamburg. Trained in industrial design, she was drawn to the tactile world of textiles, creating bags and accessories for international brands before founding her sustainable label.

Her creative process starts with simple gestures: folds, shapes, and the quiet transformation of the material. She often starts with paper and tape to explore form before moving into fabric. The TAMI tote is a sculptural bag defined by origami-inspired folds. Its geometric construction strikes a balance between structure and adaptability, and concealed slip pockets along the diagonal folds ensure a seamless, elegant design.


Watch this video to learn how to make a TAMI Bag:

Sculptural Pattern With Transformation Possibilities

This tutorial video walks you through making the TAMI Bag, designed by Regina Winther. The pattern is featured in TAUKO Magazine Issue No.18 (our Pockets issue) and is also available as a standalone PDF pattern.
The video covers every step of the process: preparing the pieces, collecting the accessories, assembling the snaps, assembling the shell and the lining, attaching the handles and the cord — making it easy to follow from start to finish.


You can get the pattern for making your TAMI Bag pattern from the print magazine, TAUKO Magazine issue No.18 or as a PDF pattern.

Available as PDF pattern and included in the TAUKO Magazine issue No.18


To understand all you can do with this pattern, check out the community's creations and find the inspiration to make your version. We'd love to share your project, so please tag us @taukomagazine and #taukotami and send us photos of your make to magazine@taukodesign.fi to be featured!

TAMI by Nele / @cornelia_studio


LINDEN Shorts & Trousers: Tutorial By Laura Fullerton

Watch this LINDEN Shorts tutorial by designer Laura Fullerton!

Laura is a Canadian sewing pattern designer and the founder of Capstone Pattern Co. Drawing inspiration from nature, architectural design, and classic tailoring, Laura strives to incorporate unique design elements and thoughtful finishing techniques into her work.

When designing the LINDEN trousers, Laura was inspired to create classically tailored yet playful high-volume style that could be dressed up or down. LINDEN designed with versatility in mind, featuring five pockets in three different style, an adjustable waistband, and large double pleats. The generous slant pockets and back welt pockets are both stylish and functional, while the front coin pocket provides convenient storage for small items. LINDEN has fitted yet oversized silhouette which makes it a fun statement piece for any wardrobe.


Watch these two videos to learn how to make a LINDEN Shorts:

Classic Tailoring Yet Playful Style

This tutorial videos walk you through making the LINDEN Shorts, designed by Laura Fullerton. LINDEN can be sewn as full-length trousers as well.The pattern is featured in TAUKO Magazine Issue No.18 (our Pockets issue) and is also available as a standalone PDF pattern.
The video covers every step of the process — PART 1 shows Steps 1-22 and PART 2 shows Steps 23-50 — making it easy to follow from start to finish.


You can get the pattern for making your LINDEN Shorts & Trousers pattern from the print magazine, TAUKO Magazine issue No.18 or as a PDF pattern.

Available as PDF pattern and included in the TAUKO Magazine issue No.18


To understand all you can do with this pattern, check out the community's creations and find the inspiration to make your version. We'd love to share your project, so please tag us @taukomagazine and #taukolinden and send us photos of your make to magazine@taukodesign.fi to be featured!

LINDEN by Katrien / @creating.katrien


CREST Dress Tutorial: Zero-Waste Design By Birgitta Helmersson

Discover the CREST Dress tutorial by Birgitta Helmersson, an exploration of zero-waste design. The pattern is also available as a blouse.

Birgitta Helmersson is a Swedish-Australian designer and pattern maker based in Malmö, Sweden. With over two decades of experience in fashion and textiles, her work centres on zero-waste pattern cutting and the thoughtful use of repurposed and leftover fabrics.

She founded her namesake label in Melbourne in 2013. After moving to Sweden, she co-founded Helgrose in 2018 and, more recently, The Cloth Lab in 2025—both grounded in a shared commitment to creating without waste through garments, workshops, and design development.


Watch this video to learn how to make a CREST Dress:

Combining Fluidity with Architectural Form

This tutorial video walks you through making the CREST Dress, designed by Birgitta Helmersson. The pattern is featured in TAUKO Magazine Issue No.19 (our Nordic Summer issue) and is also available as a standalone PDF pattern.

The video covers every step of the process: drawing the pattern directly on the fabric, cutting and assembling pieces, creating rouleau ties, attaching the bias, upper and lower casings and finally, collecting the lovely gathers on the waist and shoulder line.

You can sew a dress or a blouse version of this design.


You can get the pattern for making your CREST Dress pattern from the print magazine, TAUKO Magazine issue No.19 or as a PDF pattern.

Available as PDF pattern and included in the TAUKO Magazine issue No.19


To understand all you can do with this pattern, check out the community's creations and find the inspiration to make your version. We'd love to share your project, so please tag us @taukomagazine and #taukocrest and send us photos of your make to magazine@taukodesign.fi to be featured!

CREST by Pauliina/@kuitukuiskaaja


CREST_TAUKO19_0944_by_Laura_Oja.jpg